
Wet sanding wood with oil is a technique used to achieve a smoother finish on wood surfaces. It is a process that involves sanding the wood with progressively finer grit sandpaper while applying oil to the surface. The oil acts as a lubricant, reducing friction between the sandpaper and the wood, resulting in a smoother finish.

Understanding wet sanding is essential before attempting to use this technique. Wet sanding with oil is different from dry sanding because it requires the use of wet sandpaper and oil. Wet sandpaper is designed to hold up when wet, while dry sandpaper is not. Wet sandpaper also comes in a much finer grit, which produces a smoother finish. The oil used in wet sanding serves as a lubricant, reducing friction between the sandpaper and the wood, resulting in a smoother finish.
Key Takeaways
- Wet sanding wood with oil is a technique used to achieve a smoother finish on wood surfaces.
- Wet sanding with oil is different from dry sanding because it requires the use of wet sandpaper and oil.
- The oil used in wet sanding serves as a lubricant, reducing friction between the sandpaper and the wood, resulting in a smoother finish.
Understanding Wet Sanding
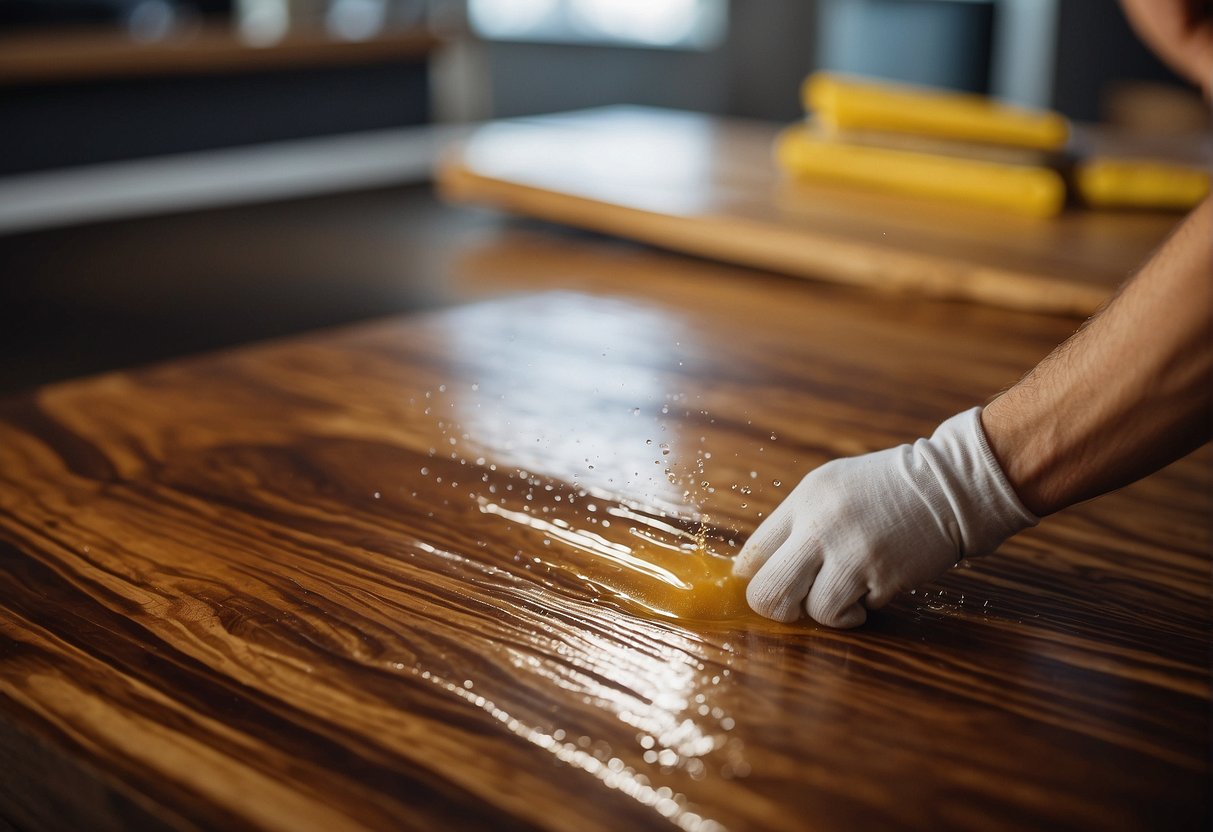
As a woodworker, I have found that wet sanding with oil is an effective way to achieve a smooth finish on wood. Wet sanding involves using a lubricant, such as water or oil, to reduce the friction between the sandpaper and the wood surface. This process helps to prevent the sandpaper from clogging with dust, which can result in scratches on the surface of the wood.
Wet Sanding vs. Dry Sanding
The main difference between wet sanding and dry sanding is the use of a lubricant. Dry sanding involves using sandpaper without any lubricant, while wet sanding involves using a lubricant to reduce friction. Wet sanding is often preferred over dry sanding because it produces a smoother finish and reduces the amount of dust generated during the sanding process.
Benefits of Wet Sanding Wood
Wet sanding wood with oil has several benefits. First, it helps to hydrate and protect the wood, which can prevent it from drying out and cracking over time. Second, wet sanding with oil creates a slurry of fine wood dust and oil that fills in the pores of the wood grain, resulting in a smooth, satin finish on the sanded piece. Finally, wet sanding with oil brings out an especially rich depth of color in the wood.
When wet sanding wood with oil, it is important to use the right type of sandpaper. Wet sandpaper is designed to hold up when wet, while dry sandpaper is not. Wet sandpaper also comes in a much finer (higher numbered) grit, which produces a smoother finish. It is also important to thoroughly remove sanding dust from the pores of the wood using compressed air or a shop vacuum and tack cloth before applying the oil.
In conclusion, wet sanding with oil is an effective way to achieve a smooth finish on wood. It helps to hydrate and protect the wood, fills in the pores of the wood grain, and brings out an especially rich depth of color. By using the right type of sandpaper and following proper sanding techniques, woodworkers can achieve a professional-looking finish on their projects.
Preparing for Wet Sanding

Wet sanding wood with oil is an effective method to achieve a smooth and polished finish on your wooden projects. However, before you start wet sanding, it’s important to prepare properly to ensure the best results. Here are some essential steps to follow when preparing for wet sanding.
Choosing the Right Sandpaper
The first step is to choose the right sandpaper grit for your project. Wet sandpaper is designed to be used with water or lubricant, which helps to reduce dust particles and prevent clogging. The grit size of sandpaper determines how coarse or fine it is. For wet sanding, it’s recommended to start with a coarser grit, such as 220 or 320, and gradually work your way up to a finer grit, such as 800 or 1000. This will help to achieve a smooth and even surface.
Selecting a Suitable Lubricant
When wet sanding, it’s important to use a suitable lubricant to prevent the sandpaper from clogging and to reduce heat and friction. There are several types of lubricants that can be used, including mineral oil, furniture oil, and even water-based polyurethane. However, oil-based polyurethane is the most commonly used lubricant for wet sanding wood with oil. It provides a smooth finish and helps to protect the wood from moisture and wear.
Safety Considerations
It’s important to take safety precautions when wet sanding, especially when using oil-based products. The dust particles produced during sanding can cause respiratory problems, so it’s recommended to wear a dust mask or respirator. It’s also important to work in a well-ventilated area and to avoid inhaling the dust particles. Additionally, it’s important to use gloves to protect your hands from the oil-based products.
In summary, preparing for wet sanding requires choosing the right sandpaper grit, selecting a suitable lubricant, and taking safety precautions. By following these steps, you can achieve a smooth and polished finish on your wooden projects.
The Wet Sanding Process

Wet sanding wood with oil can give you a beautiful, rich finish, a deeper and more striking coloration, and added protection against aridity, external moisture, and damage. The natural grain and color variation of the wood will truly stand out, and look even more amazing. Wet sanding with oil will give the grain a slightly wet, deeper appearance that will make your wood furniture or flooring look more polished and refined.
Sanding Technique
The first step in wet sanding wood with oil is to sand the surface to 320-grit. Thoroughly remove sanding dust from the pores of the wood using compressed air of a shop vacuum and tack cloth. Wet sand with a simple solution of liquid detergent and water, using a rubber sanding block. Wet sanding requires specific waterproof sandpaper and is almost always done by hand. Because wet sanding is a finishing process, you’ll likely use high-grit sandpaper, from 1000 grit to 3000 grit and above.
Working with the Wood Grain
When wet sanding wood with oil, it’s important to work with the grain of the wood to avoid scratches and other damage. Sanding against the grain can leave visible scratches and marks that can be difficult to remove. When sanding with the grain, use a circular motion to avoid creating visible sanding marks.
Managing Moisture Content
Wet sanding wood with oil requires the wood to be wet. However, it’s important to manage the moisture content of the wood to avoid warping, cracking, or other damage. Use a moisture meter to ensure that the wood is not too wet or too dry before you begin sanding. If the wood is too wet, it can warp or crack as it dries. If the wood is too dry, it may not absorb the oil properly, resulting in an uneven finish.
Overall, wet sanding wood with oil is a simple process that can result in a beautiful, polished finish. By following the proper sanding technique, working with the grain of the wood, and managing the moisture content of the wood, you can achieve a stunning finish that will make your furniture or flooring look more refined and polished.
After Wet Sanding
Once you have finished wet sanding your wood with oil, it is important to clean and finish the surface properly to achieve the desired results.
Cleaning and Finishing
To clean the surface, use a tack cloth to remove any remaining debris or sanding dust. Compressed air can also be used to remove any remaining dust particles from the surface.
Once the surface is clean, you can apply the final finish. Depending on the desired finish, you may choose to use varnish, polyurethane, paint, lacquer, or another type of wood finish. You can choose a satin finish for a more subtle sheen or a gloss finish for a more reflective surface.
Applying the Final Finish
When applying the final finish, it is important to follow the manufacturer’s instructions carefully. Apply the finish evenly and allow it to dry completely before applying a second coat if necessary.
If you are using a water-based finish, make sure the surface is completely dry before applying the finish. If you are using an oil-based finish, make sure the surface is completely dry before applying the finish and allow plenty of time for the finish to cure.
Remember to use dry sandpaper between coats to achieve a smooth surface. Use a higher grit sandpaper for each subsequent coat, starting with 220 grit and moving up to 400 grit or higher for the final coat.
In conclusion, wet sanding wood with oil can be a great way to achieve a beautiful finish on your woodworking projects. By following the proper cleaning and finishing techniques, you can achieve a professional-looking finish that will last for years to come.
Choosing Wood and Oil for Wet Sanding
Wet sanding wood with oil can be a great way to achieve a smooth and polished finish. However, not all types of wood are suitable for wet sanding. In addition, selecting the right type of oil is crucial for achieving the desired results.
Best Types of Wood for Wet Sanding
When it comes to wet sanding, some woods are more suitable than others. Hardwoods such as oak, ash, mahogany, and walnut are ideal for wet sanding because they have a tighter grain structure and are less likely to absorb excess oil. Softwoods, on the other hand, are not recommended for wet sanding because they tend to have a more open grain structure, which can lead to uneven results.
Selecting the Right Oil
There are several types of oils that can be used for wet sanding wood, including tung oil, mineral spirits, and furniture oil. Tung oil is a popular choice because it dries quickly and provides a durable finish. Mineral spirits can be used to thin the oil and make it easier to apply, while furniture oil is a good choice if you want to achieve a high-gloss finish.
When selecting an oil, it is important to consider the type of wood you are working with and the desired finish. For example, if you are working with a hardwood and want a natural-looking finish, tung oil may be the best choice. If you want a high-gloss finish, furniture oil may be a better option.
In conclusion, choosing the right wood and oil is essential for achieving the desired results when wet sanding wood. Hardwoods such as oak, ash, mahogany, and walnut are ideal for wet sanding, while softwoods should be avoided. Tung oil, mineral spirits, and furniture oil are all good choices for wet sanding, depending on the type of wood and desired finish.
Frequently Asked Questions
What type of sandpaper grit should be used when applying Danish oil?
When applying Danish oil, it is recommended to use a fine-grit sandpaper between 220 and 400 grit for the initial sanding. This will help to remove any rough spots and prepare the surface of the wood for the oil. After applying the first coat of Danish oil, it is recommended to sand the surface again with a finer grit sandpaper, such as 600 grit, to achieve a smooth finish.
Is it necessary to sand between each coat of boiled linseed oil?
Yes, it is recommended to sand between each coat of boiled linseed oil. This will help to remove any bumps or rough spots that may have formed during the application process and ensure a smooth finish. It is recommended to use a fine-grit sandpaper, such as 600 grit, for this process.
Can boiled linseed oil be used as a lubricant during the wet sanding process?
No, boiled linseed oil should not be used as a lubricant during the wet sanding process. Instead, it is recommended to use a solution of liquid detergent and water as a lubricant. This will help to prevent the sandpaper from clogging and ensure a smooth finish.
How should wood be prepared for oiling after wet sanding?
After wet sanding, it is important to allow the wood to dry completely before applying any oil. Once the wood is dry, it should be wiped down with a clean cloth to remove any dust or debris. It is also recommended to apply a sealer or wood conditioner before applying the oil to ensure an even finish.
What are the best practices for sanding between coats of tung oil?
When sanding between coats of tung oil, it is recommended to use a fine-grit sandpaper, such as 600 grit. It is important to sand lightly and avoid sanding through the previous coat of oil. After sanding, the surface should be wiped down with a clean cloth to remove any dust or debris before applying the next coat of oil.
What are the advantages of wet sanding wood with oil compared to dry sanding?
Wet sanding wood with oil has several advantages over dry sanding. First, it helps to prevent clogging of the sandpaper, ensuring a smooth finish. Second, it helps to reduce the amount of dust created during the sanding process, making it easier to clean up. Finally, wet sanding with oil can help to lubricate the surface of the wood, reducing the risk of scratching or damaging the surface during sanding.

Hi, I’m Sal Muller of Tooltrip.com. My DIY experience led me to understand essential power tools for home projects. Tooltrip.com guides enthusiasts and professionals in choosing right tools for any job. I provide concise top tool reviews for easier, efficient DIY.
