If you’re a woodworking enthusiast, you know how important it is to have a perfectly smooth and leveled table top. Using an electric planer can be an efficient way to achieve this. In this article, I will guide you through the process of planing a table top with an electric planer.
Understanding how an electric planer works is crucial before using it. It’s a powerful tool that can efficiently remove excess material on your table top, leaving you with a smooth and perfect finish. However, it can also be dangerous if not used properly. Therefore, it’s essential to follow proper safety precautions to avoid any accidents.
To get started, you need to prepare the table top and the electric planer. Once you have everything in place, you can start using the electric planer to shave off the wood. Proper planing technique is essential to achieve the finish you want to achieve. After planing, you may need to address any imperfections and finish the table top. Lastly, you need to maintain and care for your electric planer to ensure it lasts for a long time.
Key Takeaways
- Understanding how an electric planer works is crucial before using it.
- Proper safety precautions must be followed when using an electric planer.
- Proper planing technique is essential to achieve a smooth and perfect finish.
Understanding the Electric Planer
https://www.youtube.com/watch?v=qEx3WBgNdFI&embed=true
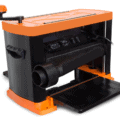
As a woodworker, an electric planer is an indispensable tool that can make quick work of smoothing down rough or uneven surfaces on a tabletop. An electric planer is a type of power tool that uses a motor to rotate a blade at high speed, which shaves off thin layers of wood to create a smooth and even surface.
Electric planers come in different types, shapes, and sizes, but they all have some common features. Most electric planers have a knob that allows you to adjust the depth of cut, which determines how much wood is removed with each pass. Some electric planers also have a trigger that controls the speed of the motor, which affects the rate at which the blade rotates.
When using an electric planer, it is important to pay attention to the cable and make sure it is not tangled or twisted. A tangled cable can cause the electric planer to malfunction or even cause injury. It is also important to use a sharp blade and to check the blade regularly for signs of wear and tear. A dull blade can cause the electric planer to overheat and damage the wood.
One of the benefits of using an electric planer is that it can save you a lot of time and effort compared to using a hand-held sander. Electric planers can remove wood much faster than hand-held sanders, which can be especially helpful when working on a large project. However, it is important to follow the manufacturer’s instructions when using an electric planer, as improper use can lead to damage or injury.
In terms of durability, electric planers are generally built to last and can withstand heavy use. However, it is important to clean and maintain your electric planer regularly to ensure it continues to work properly. This includes cleaning the blade, lubricating the moving parts, and storing the electric planer in a dry and safe place.
Overall, an electric planer is a powerful and versatile tool that can help you achieve a smooth and even surface on your tabletop. By understanding how an electric planer works and following the manufacturer’s instructions, you can use this power tool safely and effectively to achieve professional-looking results.
Safety Precautions
When using an electric planer on a table top, safety should always be a top priority. The following safety precautions should be taken to minimize the risk of injury:
Wear Safety Gear
Wearing appropriate safety gear is crucial when using an electric planer. Safety goggles protect your eyes from flying debris, while gloves provide a better grip and protect your hands from splinters. A dust mask will prevent you from inhaling wood dust, which can be harmful to your respiratory system. Additionally, hearing protection is recommended to reduce the risk of hearing damage from the loud noise produced by the planer.
Unplug the Planer
Before changing blades, adjusting the depth of cut, or making any other adjustments to the planer, unplug it from the power source. This will prevent the planer from accidentally turning on and causing injury.
Keep Your Workspace Clean
Keep your workspace clean and free of clutter to minimize the risk of tripping or falling. Make sure that the table top is securely clamped to the workbench and won’t move during planing.
Follow Safety Tips
Follow all safety tips provided in the manufacturer’s manual. Never attempt to modify or repair the planer yourself, as this can be dangerous and void the warranty.
By following these safety precautions, you can minimize the risk of injury when using an electric planer on a table top. Remember to always prioritize safety and take the necessary precautions to protect yourself.
Preparation for Planing
https://www.youtube.com/watch?v=Mp2vSodcTOQ&embed=true
Before beginning the process of planing a table top with an electric planer, it is important to properly prepare the workspace and the table top. This will ensure that the planing process goes smoothly and the end result is a flat, even surface.
Clean the Table Top
Firstly, I need to clean the table top. It is important to remove any dirt, debris, or other materials from the surface of the table top. I can use a clean cloth to wipe the table top, ensuring that I do not add any moisture to the wood. If there are any stubborn spots, I can use sandpaper to smooth them out.
Check the Size and Level of the Table Top
It is important to check the size and level of the table top before planing. If the table top is too large to fit on my workbench, I can use a stand to support it. I also need to ensure that the table top is level, as any unevenness will affect the planing process.
Choose the Right Material and Type of Wood
Choosing the right material and type of wood is crucial for a successful planing process. I should select lumber that is straight and free of knots, as knots can cause the planer blade to get stuck. I also need to consider the wood grain and grain orientation, as this can affect the direction in which I plane the table top.
Secure the Table Top with Clamps
To prevent the table top from moving during the planing process, I need to secure it with clamps. I can use a pencil to mark the areas where the clamps will go, ensuring that they do not interfere with the planing process.
Apply Wax or Paint to the Table Top
After planing, the table top may be left with an uneven surface. To smooth it out, I can apply a coat of wax or paint to the surface. This will also protect the table top from moisture and other damage.
By following these steps, I can properly prepare the table top for planing with an electric planer. This will ensure that the planing process goes smoothly and the end result is a flat, even surface.
Proper Planing Technique
https://www.youtube.com/watch?v=HJtysNFbZ-o&embed=true
When using an electric planer to plane a table top, it is important to use the proper technique to achieve the desired results. Here are some tips to help you achieve a smooth finish:
Stance and Posture
First, stand in a comfortable position with your feet shoulder-width apart. Keep your knees slightly bent and your back straight. This will help you maintain control and balance while using the planer.
Depth of Cut
Adjust the depth of cut according to the thickness of the wood and the amount you want to remove. Most electric planers have a depth adjustment knob that allows you to set the depth of the cut. Start with a shallow cut and gradually increase the depth until you achieve the desired result.
Movement and Direction
When using an electric planer, move the planer in the direction of the wood grain. This will help prevent tear-out and ensure a smooth finish. Use your hands to guide the planer and apply even pressure to the handle.
Speed and Sharpness
Maintain a consistent speed while planing, and ensure that the blades are sharp. Dull blades can cause rough cuts and tear-out, which will result in an uneven surface.
Smoothing and Shaping
After planing the table top, use a hand plane or hand planer to smooth out any rough spots or high spots. This will help you achieve an even surface. You can also use the hand plane to shape the edges of the table top.
By following these steps, you can achieve a smooth finish on your table top and create professional-looking woodworking projects. These tips are especially helpful for beginners who are new to using electric planers.
Addressing Imperfections and Finishing
https://www.youtube.com/watch?v=Ic4r0VRAbiY&embed=true
After planing the table top, it is essential to address any imperfections that may still be present. Imperfections can include unevenness, tear-out, snipe, and damage caused by the planer blades. To address these issues, I recommend sanding the table top with progressively finer grits of sandpaper until the surface is smooth and even.
Once the sanding is complete, it is time to finish the table top. There are various finishes available, including varnish, oil, and wax. Each finish has its own characteristics, and the choice of finish depends on personal preference and the intended use of the table.
If you choose to use varnish, I recommend applying it in thin coats with a brush or a cloth. Allow each coat to dry completely before applying the next one. Sand lightly between coats to ensure a smooth finish. Varnish provides a durable finish that protects the table top from moisture and wear.
If you prefer an oil finish, apply it with a cloth or a brush, and allow it to soak into the wood for several minutes before wiping off the excess. Oil finishes provide a natural look and feel to the table top and require periodic reapplication.
Wax finishes provide a soft, low-sheen finish and are easy to apply. Simply rub the wax onto the surface of the table top with a cloth and buff it to a shine. Wax finishes do not provide as much protection as varnish or oil finishes, but they do enhance the natural beauty of the wood.
In conclusion, addressing imperfections and finishing the table top are essential steps in the planing process. Sanding the table top and applying a finish not only improve the appearance of the table but also protect it from wear and tear. With the right techniques and materials, anyone can achieve a smooth, beautiful finish on their table top.
Maintenance and Care
https://www.youtube.com/watch?v=OCcRRvPsk-Q&embed=true
To keep your electric planer in top condition, it’s essential to perform regular maintenance and care. Here are some tips to keep your planer running smoothly and delivering tip-top results every time.
Clean the Planer
After each use, clean the planer thoroughly to remove sawdust and excess material. Use a brush or compressed air to remove debris from the cutting blades and other parts of the planer. Be sure to disconnect the planer from the power source before cleaning.
Sharpen the Blades
Sharp blades are essential for achieving smooth and even cuts. Check the blades regularly for signs of wear and tear. If the blades are dull, sharpen them or replace them with new ones. You can sharpen the blades yourself or take them to a professional for sharpening.
Store the Planer Properly
When you’re not using the planer, store it in a carrying case or other protective container to prevent damage. Keep the planer in a dry, cool place away from moisture and direct sunlight.
Check for Loose Parts
Before each use, check the planer for loose parts or screws. Tighten any loose screws or bolts to ensure the planer is safe to use.
Use the Planer Safely
Always follow the manufacturer’s instructions for using the planer safely. Wear protective gear, such as safety glasses and earplugs, when using the planer. Never use the planer on wet or damp wood, and always keep your fingers away from the cutting blades.
By following these maintenance and care tips, you can keep your electric planer in top condition and ensure it delivers smooth and even cuts every time.
Frequently Asked Questions

What is an electric hand planer?
An electric hand planer is a handheld power tool that is used to remove thin layers of wood from a surface. It is commonly used in woodworking to smooth out rough surfaces, straighten edges, and reduce the thickness of a workpiece. Electric hand planers are available in various sizes and styles, and they can be used on a wide range of materials, including wood, plastic, and metal.
How does an electric hand planer work?
An electric hand planer works by using a set of rotating blades to shave off thin layers of material from a surface. The blades are mounted on a cutting head that is attached to the body of the planer. When the planer is turned on, the blades spin rapidly, and the user guides the planer over the surface of the workpiece, removing small amounts of material with each pass.
What are some tips for using an electric hand planer on a table top?
When using an electric hand planer on a table top, it is important to secure the workpiece firmly in place to prevent it from moving during the planing process. It is also important to adjust the depth of cut to remove only a small amount of material with each pass, which will help to prevent the planer from removing too much material and damaging the workpiece. Additionally, it is important to plane in the direction of the grain to prevent tear-out and to achieve a smooth surface.
Can a hand planer be used to flatten a table top?
While a hand planer can be used to flatten a table top, it is generally not the most efficient or effective tool for the job. Hand planing a large surface area can be time-consuming and physically demanding, and it can be difficult to achieve a perfectly flat surface without the aid of a jointer or other specialized tools. For flattening a table top, an electric planer or a belt sander may be a better option.
What are some beginner-friendly techniques for using an electric planer?
One beginner-friendly technique for using an electric planer is to start with a scrap piece of wood to get a feel for the tool before working on the actual workpiece. It is also important to take small passes and to check the depth of cut frequently to avoid removing too much material. Additionally, it is important to maintain a steady pace and to keep the planer moving in a straight line to avoid creating uneven surfaces.
How do you hand plane a surface flat without an electric planer?
Hand planing a surface flat without an electric planer requires a few specialized tools and techniques. The first step is to use a jointer to flatten one face of the workpiece, which will serve as a reference surface for the rest of the planing process. Next, a hand plane is used to remove material from the opposite face of the workpiece until it is flat and parallel to the reference face. Finally, a smoothing plane is used to remove any remaining marks and to achieve a smooth surface. This process can be time-consuming and physically demanding, but it can produce excellent results in the hands of an experienced woodworker.

Hi, I’m Sal Muller of Tooltrip.com. My DIY experience led me to understand essential power tools for home projects. Tooltrip.com guides enthusiasts and professionals in choosing right tools for any job. I provide concise top tool reviews for easier, efficient DIY.