
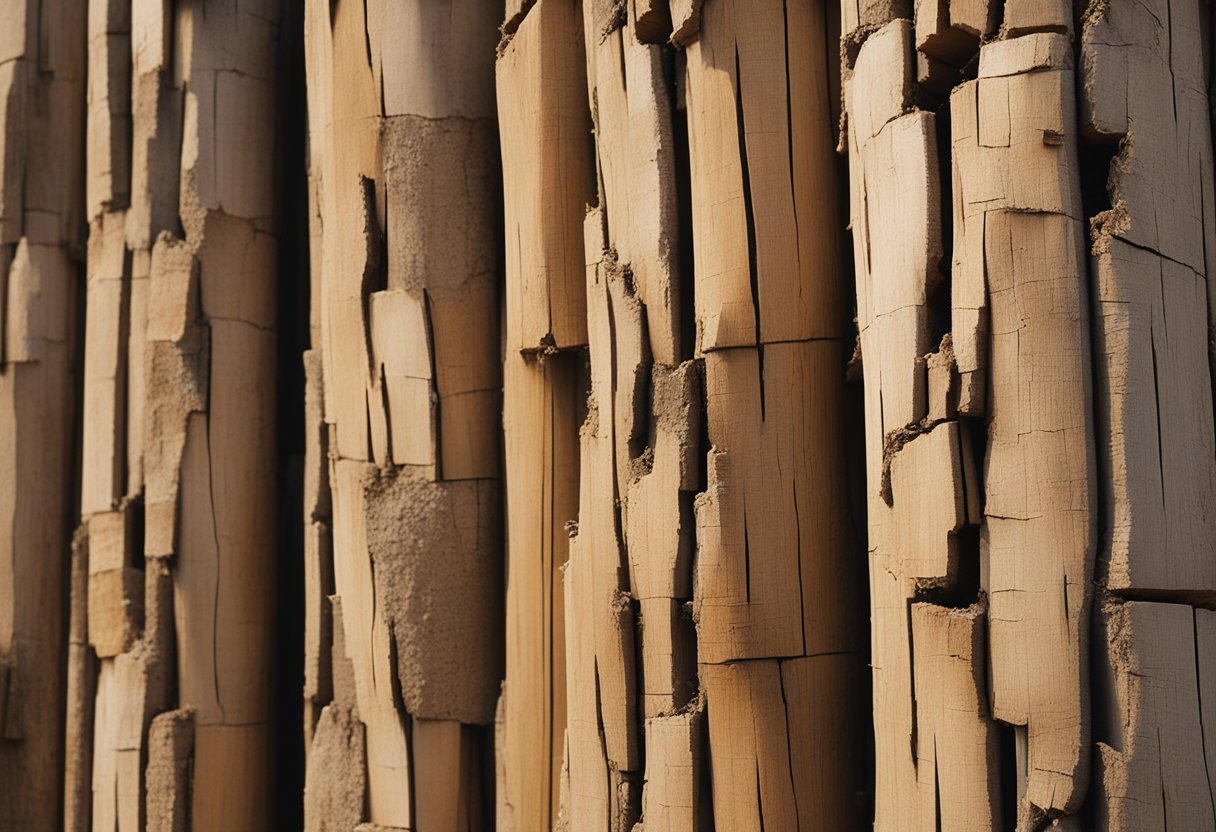
Filling large cracks in wood posts can be a challenging task, but it is essential to maintain the structural integrity of the wood. Cracks can develop due to various reasons like natural aging, weather conditions, or insect infestation. Ignoring these cracks can lead to further damage and even collapse of the post, which can be dangerous. Therefore, it is crucial to address the problem as soon as possible.

Before filling the cracks, it is vital to identify the problem and assess the damage. Not all cracks require filling, and sometimes, the post may need to be replaced entirely. Once you have determined that the crack needs to be filled, you need to prepare the wood post by cleaning and widening the crack. Choosing the right filler is also essential as it should be strong, durable, and waterproof to withstand weather conditions and prevent further damage.
Key Takeaways
- Assess the damage and identify the problem before filling the crack
- Proper preparation, cleaning, and choice of filler are essential for effective repair
- Regular maintenance and inspection can prevent cracks and prolong the life of wood posts
Identifying the Problem
As a woodworker, I understand the importance of identifying the problem before attempting to fix it. When it comes to repairing large cracks in wood posts, the first step is to assess the damage.
Start by examining the wood post to determine the extent of the cracks or splits. If the crack is small, it can be easily filled with wood filler. However, if the crack is large or if there are multiple cracks, it may require more extensive repair work.
It’s important to identify the type of crack and determine a solution to prevent further damage. For example, if the crack is due to rot or insect damage, it may be necessary to replace the post altogether.
Another important factor to consider when identifying the problem is the structural integrity of the post. If the post is bending or splitting to the point where it is at risk of failure, it needs to be repaired or replaced immediately.
In summary, identifying the problem is the first step in repairing large cracks in wood posts. Assess the damage, determine the type of crack, and consider the structural integrity of the post before deciding on a solution.
Preparation Before Filling
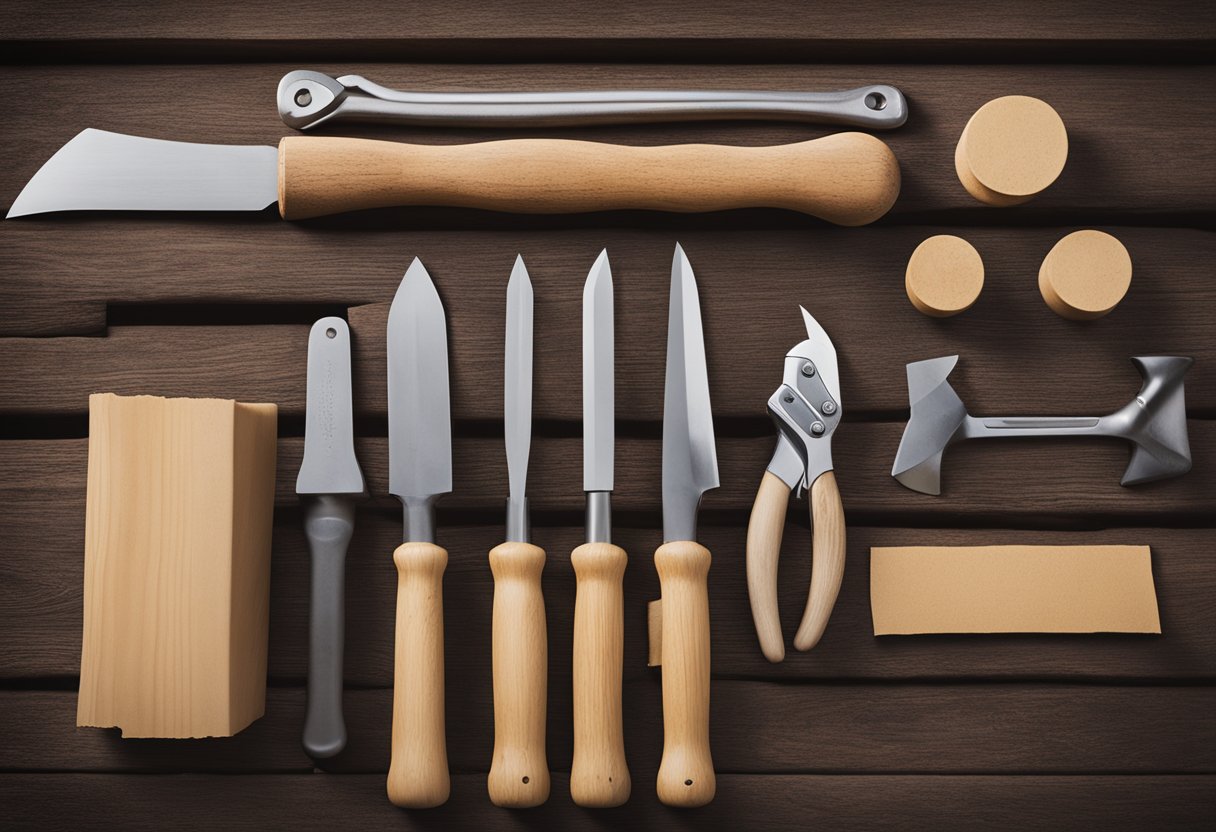
Before filling large cracks in wood posts, it’s important to properly prepare the surface to ensure a successful repair. Here are some steps to take before filling:
Cleaning
The first step in preparing the wood post is to clean it thoroughly. Use a stiff-bristled brush to remove any loose or splintered pieces of wood, and use a vacuum or compressed air to get rid of any sawdust or other debris. This will ensure that the filler adheres properly to the wood.
Chiseling
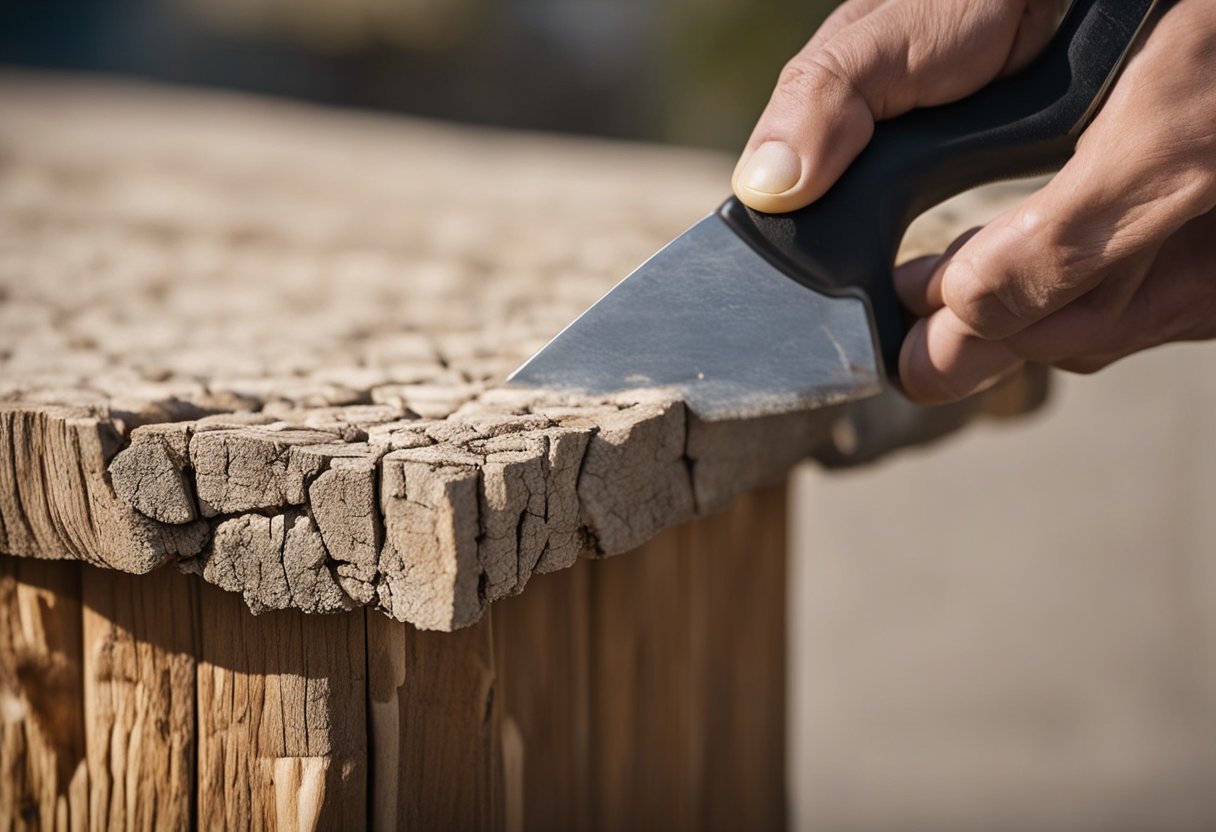
Next, use a chisel or flathead screwdriver to widen the crack slightly. This will create a groove that will make it easier to fill the crack with the filler. Be careful not to widen the crack too much, as this can weaken the structure of the post.
Sanding
After chiseling, sand the surface of the wood post with fine-grit sandpaper. This will help to smooth out any rough edges and create a clean surface for the filler to adhere to.
Moisture
It’s important to ensure that the wood post is dry before filling any cracks. Moisture can prevent the filler from adhering properly to the wood, so make sure the post is completely dry before proceeding.
Putty Knife
Finally, use a putty knife to apply the filler to the crack. Make sure to apply enough filler to completely fill the crack, but be careful not to overfill it. Use the putty knife to smooth out the surface of the filler and ensure that it is level with the surface of the wood post.
By following these preparation steps, you can ensure that the filler adheres properly to the wood post and creates a strong, long-lasting repair.
Choosing the Right Filler
When it comes to filling large cracks in wood posts, choosing the right filler is crucial. You want a filler that is strong, durable, and long-lasting. There are several options available, each with its own set of pros and cons.
Wood Filler
One option is to use wood filler. Wood filler is a putty-like substance that can be applied to the crack and then sanded down to create a smooth, solid surface. Wood filler is easy to work with and can be stained or painted to match the surrounding wood. However, it is not as strong or durable as other fillers and may shrink or crack over time.
Epoxy Filler
Another option is to use an epoxy filler. Epoxy is a two-part adhesive that is stronger and more durable than wood filler. It is also waterproof and resistant to rot, making it ideal for outdoor use. However, epoxy can be more difficult to work with and may require more preparation and cleanup.
Resin
Resin is another option for filling large cracks in wood posts. Resin is a liquid that hardens into a solid when it dries. It is strong, durable, and waterproof, making it ideal for outdoor use. However, resin can be messy to work with and may require more preparation and cleanup.
Sawdust and Filler Stick
If you want a more natural look, you can mix sawdust with a filler stick to create a custom filler that matches the color and grain of the surrounding wood. This method is ideal for small cracks and gaps. However, it is not as strong or durable as other fillers and may shrink or crack over time.
Wood Glue
Wood glue is another option for filling large cracks in wood posts. Wood glue is strong, durable, and easy to work with. However, it is not waterproof and may not be suitable for outdoor use.
Waterproof Glue
If you need a waterproof solution, a waterproof glue like a powdered resin (e.g., Cascamite) is ideal for most cracks. It is strong, durable, and waterproof, making it ideal for outdoor use. However, it can be difficult to work with and may require more preparation and cleanup.
Stainable Fillers
If you want to stain or paint your wood post after filling the crack, be sure to choose a stainable filler. These fillers can be stained or painted to match the surrounding wood, creating a seamless and natural look.
Filling the Cracks
When it comes to filling large cracks in wood posts, there are a few steps you can follow to ensure the best results. First, assess the damage to determine the extent of the cracks or splits. Ensure the post is still structurally sound and doesn’t need to be replaced. Once you have determined that the post is still sound, you can begin filling the cracks.
The first step in filling large cracks in wood posts is to clean out the crack. Use a stiff-bristled brush to remove any loose or splintered pieces of wood, and use a vacuum or compressed air to get rid of any sawdust or other debris. Once the surface is clean, use a chisel or flathead screwdriver to widen the crack slightly. This will allow the filler to penetrate deeper into the crack.
Next, apply the filler to the crack. There are a variety of fillers available, including epoxy, wood putty, and wood filler. Choose a filler that is appropriate for the size and depth of the crack. Apply the filler with a putty knife, making sure to push the filler into the crack as you go. Be sure to overfill the crack slightly, as the filler will shrink as it dries.
Once the filler has dried, use sandpaper to smooth out the surface of the post. Start with a coarse grit sandpaper and work your way up to a finer grit. Sand the surface until it is smooth and even. If necessary, apply another coat of filler and repeat the sanding process.
In conclusion, filling large cracks in wood posts is a straightforward process that requires a few simple steps. By following these steps, you can ensure that your wood posts are structurally sound and free from unsightly cracks.
Securing and Drying
Now that the crack has been filled with the chosen adhesive, it’s time to secure it in place to ensure that it dries properly. One way to do this is to tape the crack so that the adhesive doesn’t ooze out while drying. If the crack is wider, you may need to use clamps to hold the wood post together while the adhesive dries. This will help prevent the crack from re-opening once the adhesive dries.
It’s important to allow the adhesive to cure completely before removing the tape or clamps. The curing time can vary depending on the type of adhesive used, but it’s usually recommended to wait at least 24 hours before removing any clamps or tape. Once the adhesive has cured, you can remove any excess adhesive with a sharp chisel or sandpaper.
During the drying process, it’s important to keep an eye on the wood post to ensure that it’s drying evenly. If one side of the post is drying faster than the other, it can cause the post to warp or twist. To prevent this from happening, you can rotate the post every few hours to ensure that it’s drying evenly on all sides.
It’s also important to note that wood posts can shrink as they dry, which can cause the crack to re-open. This is a natural process called shrinkage, and it’s caused by the moisture in the wood evaporating as it dries. To prevent the crack from re-opening, you can fill it again with more adhesive once the post has finished drying. This will help ensure that the crack is completely filled and that the post is structurally sound.
In conclusion, securing and drying the wood post after filling the crack is an important step in the process. By taping or clamping the crack and allowing the adhesive to cure completely, you can ensure that the post is structurally sound. Additionally, by rotating the post and filling the crack again if necessary, you can prevent the crack from re-opening due to shrinkage.
Sanding and Finishing
Once the wood filler or epoxy has been applied and allowed to dry, it’s time to sand down the surface to create a smooth finish. Sanding is an important step in the process as it helps to remove any excess filler and create a level surface. It also helps to prepare the wood for paint or stain.
I recommend using a fine-grit sandpaper, such as 220-grit, for this step. Sand the filled area until it is flush with the surrounding wood. Be sure to sand in the direction of the wood grain to avoid creating any scratches or marks.
Once the surface is smooth, you can apply paint or stain to the wood post if desired. If you are painting the post, be sure to use a primer first to help the paint adhere properly. If you are staining the post, be sure to choose a stain that matches the color of the surrounding wood.
In some cases, you may also want to add trim boards to the post to cover any cosmetic imperfections. Trim boards can be attached using wood glue and finishing nails. Be sure to sand the edges of the trim boards before attaching them to the post to create a seamless finish.
Overall, sanding and finishing are important steps in the process of filling large cracks in wood posts. With the right tools and techniques, you can create a smooth, level surface that is ready for paint or stain.
Maintaining Wood Posts
As a woodworker, I know the importance of maintaining wood posts. Wood posts are a crucial part of any construction project, and they need to be taken care of properly to ensure their longevity. Here are some tips on how to maintain wood posts:
Regular Inspection
It is important to inspect your wood posts regularly to check for any cracks, checks, or rot. This can be done by visually inspecting the post or tapping it with a hammer. If you notice any issues, it is important to address them immediately to prevent further damage.
Cleaning
Cleaning your wood posts is also important for their maintenance. You can use a soft-bristled brush and mild detergent to clean the post. Be sure to rinse it thoroughly with water and let it dry completely before applying any treatments.
Applying Treatments
There are various treatments available to help protect your wood posts from rot and decay. These treatments can be applied by brushing or spraying them onto the post. Be sure to follow the manufacturer’s instructions carefully and wear protective gear when applying the treatment.
Prevention
Prevention is key when it comes to maintaining wood posts. To prevent rot, make sure your wood posts are not in contact with the ground and are protected from moisture. You can also apply a water-resistant coating to the post to help prevent moisture from penetrating the wood.
By following these tips, you can help ensure the longevity of your wood posts and prevent costly repairs in the future.
Frequently Asked Questions
What are the common types of cracks in wood posts?
Wood posts can develop various types of cracks such as vertical cracks, horizontal cracks, checking, and splitting. Vertical cracks usually occur due to the drying process of the wood and do not pose a significant threat to the structural integrity of the post. Horizontal cracks, on the other hand, can weaken the post and lead to its failure. Checking is a type of crack that appears on the surface of the wood and is caused by the release of moisture. Splitting occurs when the wood fibers separate from each other.
How can I repair split wood gate posts?
To repair a split wood gate post, you can use a combination of wood glue and clamps. First, apply the glue to the split area and use clamps to hold the wood together until the glue dries. If the split is too severe, you may need to replace the entire post.
What is the process for repairing cracked wood pillars?
The process for repairing cracked wood pillars involves assessing the extent of the damage, removing any loose or damaged wood, filling the crack with wood filler or epoxy, and sanding the surface until it is smooth. If the crack is deep, you may need to use a combination of filler and wood dowels to reinforce the pillar.
How can I fix fence post splitting?
To fix fence post splitting, you can use a wood filler or epoxy to fill the crack. Apply the filler or epoxy to the crack and use a putty knife to smooth it out. Once the filler has dried, sand the surface until it is smooth. If the splitting is severe, you may need to replace the entire post.
What is the best way to repair deck post checking?
To repair deck post checking, you can use a wood filler or epoxy to fill the cracks. Apply the filler or epoxy to the crack and use a putty knife to smooth it out. Once the filler has dried, sand the surface until it is smooth. If the checking is severe, you may need to replace the entire post.
Should I fill cracks in pressure treated wood?
Yes, you should fill cracks in pressure treated wood to prevent moisture from entering the wood and causing further damage. Use a wood filler or epoxy that is specifically designed for pressure treated wood to fill the cracks.

Hi, I’m Sal Muller of Tooltrip.com. My DIY experience led me to understand essential power tools for home projects. Tooltrip.com guides enthusiasts and professionals in choosing right tools for any job. I provide concise top tool reviews for easier, efficient DIY.
