
Can you hammer screws? This is a question that many people ask when they don’t have the right tools to drive in a screw. While it is possible to hammer in a screw, it’s not always the best idea. In this article, I will explore the pros and cons of hammering screws, the right tools for different materials, techniques for driving screws, and alternative solutions to hammering screws.

Understanding the basics of driving screws is essential for any DIY enthusiast. A screw is a type of fastener that is designed to hold two pieces of material together. The head of the screw is used to turn the screwdriver or drill bit, which drives the screw into the material. While a hammer can be used to drive in a screw, it’s not the best tool for the job. The force of the hammer can cause the screw to strip or damage the material.
Key Takeaways
- Hammering screws is possible, but not always recommended
- The right tools for different materials are important for driving screws
- Techniques for driving screws and alternative solutions can make DIY projects easier and safer
Understanding the Basics
https://www.youtube.com/watch?v=N3jG5xtSQAo&embed=true
As a DIY enthusiast, I have always wondered if it is possible to hammer in screws. The short answer is yes, but there are some things you need to consider before attempting to do so.
Firstly, it is important to note that screws and nails are not the same. Nails are driven into wood or other materials using a hammer, whereas screws are threaded and require a screwdriver or drill to be inserted into the material. That being said, if you do not have a screwdriver or drill, you can use a hammer to insert a screw into the material.
When hammering in a screw, you need to apply a considerable amount of force to ensure that the screw penetrates the material. The amount of force required will depend on the size of the screw and the material you are working with. For example, if you are working with a softwood like pine, you will need less force than if you were working with hardwood like oak.
It is also important to note that hammering in a screw can damage the head and thread of the screw, making it difficult to remove or use again. Therefore, it is recommended to only hammer in screws if you do not plan on removing them in the future.
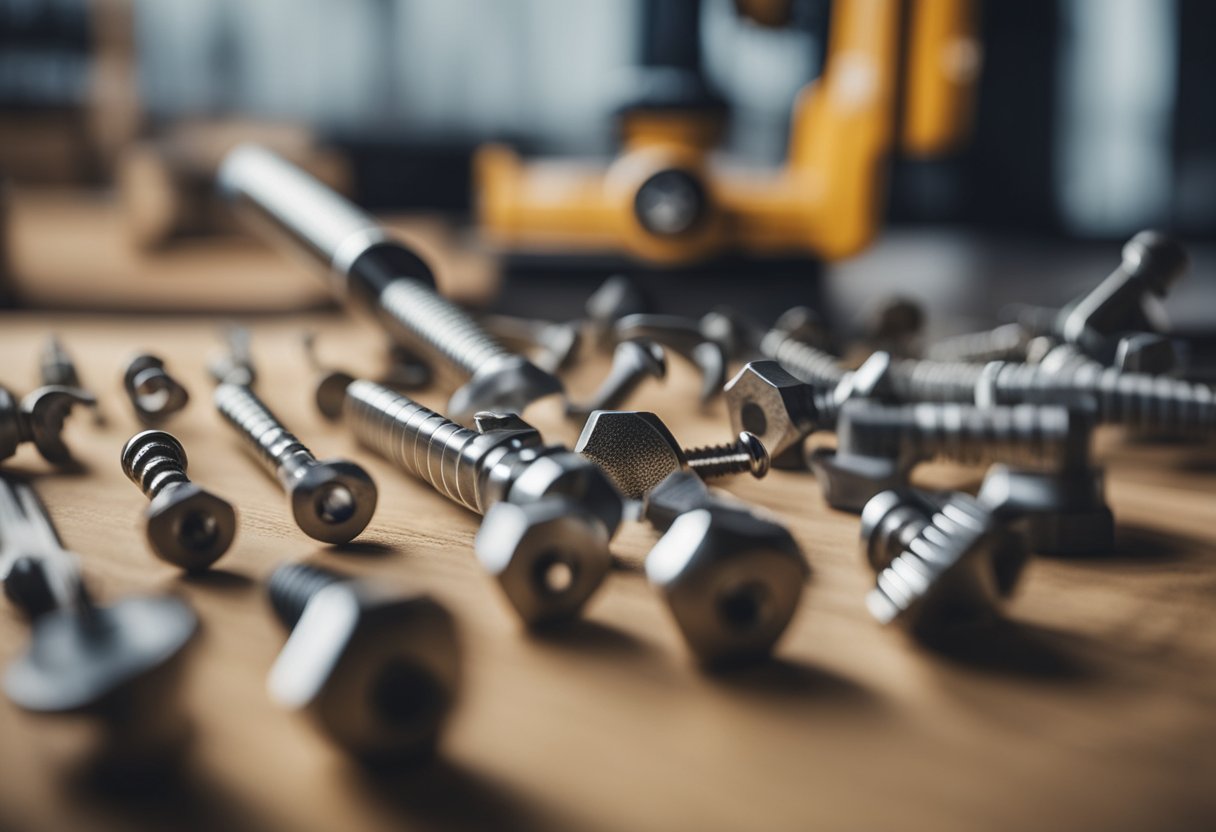
When selecting a screw to hammer in, it is important to consider the size and material of the screw. Screws with larger heads and threads will be easier to hammer in, whereas screws made from harder materials like metal may be more difficult to hammer in.
In summary, hammering in screws is possible, but it should only be done if you do not have a screwdriver or drill. When hammering in a screw, you need to apply a considerable amount of force and be careful not to damage the head or thread. It is also important to select the right size and material of screw for the job.
Why Hammering Screws is Not Recommended
https://www.youtube.com/watch?v=-tiCYRjJy3o&embed=true
As a DIY enthusiast, I understand the temptation to use whatever tool is at hand to get the job done. However, hammering screws is not recommended, and here’s why:
Damage to the Screw
When you hammer in a screw, you risk damaging the threads, which can make it difficult to screw in properly. In some cases, the screw can even break, leaving you with a piece stuck in the material you’re working on. Using the right tool for the job is crucial to avoid common mistakes and ensure that your DIY project goes smoothly.
Damage to the Material
Hammering screws can also damage the material you’re working on. For example, if you’re working with drywall, hammering a screw can cause it to crumble and create a larger hole than necessary. This can make it difficult to properly secure the screw and may require additional repairs.
The Right Tool for the Job
Using the appropriate tool for the task is essential to avoid damage and common mistakes. While a hammer can be used to drive in a screw, it is not the appropriate tool for the job. A screwdriver or drill is the recommended tool for driving in screws.
In conclusion, while it may be tempting to use a hammer to drive in a screw, it is not recommended. Hammering screws can damage both the screw and the material you’re working on. To avoid common mistakes and ensure a successful DIY project, use the appropriate tool for the job.
The Right Tools for Different Materials
When it comes to hammering screws, it’s important to choose the right tools for the job, especially when working with different materials. Using the wrong tool can damage the material or the screw, making it difficult to achieve a strong and secure hold.
Wood and Drywall
When working with wood or drywall, a regular hammer and screwdriver can work well. However, if you need to drive in a lot of screws, a power drill can save you time and effort. For larger screws, a drill with a screwdriver bit is recommended.
Metal and Hardwood
When working with metal or hardwood, it’s important to use a drill bit designed for the material. For metal, use a high-speed steel drill bit, and for hardwood, use a brad point drill bit. A power drill is also recommended for these materials, as it can provide the necessary power to drive in the screws.
Masonry and Stone
When working with masonry or stone, a regular hammer and screwdriver won’t work. Instead, use a hammer drill with a masonry bit. This will allow you to drill a hole in the material, which you can then insert a screw into.
Gypsum
When working with gypsum, it’s important to use a drywall screwdriver. This tool is designed specifically for driving screws into drywall and gypsum board, and can prevent the material from cracking or breaking.
In conclusion, choosing the right tools for different materials is crucial when hammering screws. Using the wrong tool can damage the material or the screw, making it difficult to achieve a strong and secure hold. By following these guidelines, you can ensure that your screws are properly installed and your materials are protected.
Techniques for Driving Screws
https://www.youtube.com/watch?v=SH0r85mtUIk&embed=true
As a DIY enthusiast, I know that driving screws can be a challenging task, especially when you are working on hard surfaces. However, with the right techniques, you can drive screws like a pro. Here are some techniques that I have found useful:
Pre-Drill Holes
Pre-drilling holes is a crucial technique when driving screws into hard surfaces. It helps to prevent the wood from splitting, and it also makes it easier to drive the screw into the surface. To pre-drill, use a drill bit that is slightly smaller than the screw. This will allow the screw to grip the wood better and increase its holding strength.
Use an Awl
If you are having trouble getting the screw started, you can use an awl to create a pilot hole. An awl is a pointed tool that you can use to make a small indentation in the surface. This will give the screw a starting point, making it easier to drive it into the surface.
Low-Speed Setting
When using a drill to drive screws, it is important to use a low-speed setting. This will help prevent the screw from stripping and increase its holding strength. High-speed settings can cause the screw to overheat, which can damage the surface and weaken the holding strength of the screw.
Tap the Screw
If the screw is not going in smoothly, you can tap it lightly with a hammer to help it seat itself in the screw’s slots. This technique can be especially useful when working with painted surfaces, as it can help the screw grip the surface better.
Use the Right Technique
Finally, using the right technique when driving screws can make all the difference. For example, when driving screws into metal surfaces, you may need to tap the screw with a tap to create threads before driving it in. Similarly, when working with delicate surfaces, you may need to use a delicate touch to avoid damaging the surface.
By following these techniques, you can drive screws like a pro and increase the holding strength of your screws. Remember to pre-drill, use an awl, use a low-speed setting, tap the screw, and use the right technique for the surface you are working on.
Dealing with Problematic Screws
https://www.youtube.com/watch?v=rpbL8h-7jSY&embed=true
Sometimes, screws can become stripped or damaged, making it difficult to use a screwdriver or drill to insert or remove them. In such cases, we need to use other tools to deal with the problematic screws. Here are some ways to repair stripped screws:
-
Use Pliers: If the screw is protruding, use pliers to grip the head of the screw and turn it counterclockwise to remove it. If the screw is recessed, use needle-nose pliers to grip the sides of the screw head and turn it counterclockwise.
-
Insert a Hand Tool: Another way to remove a stripped screw is to insert a hand tool, such as a flathead screwdriver or a chisel, into the groove of the screw head and turn it counterclockwise. Be careful not to damage the surrounding material.
-
Use a Screw Extractor: A screw extractor is a special tool designed to remove stripped screws. It has a reverse-threaded tip that bites into the screw head and turns it counterclockwise as you turn the extractor clockwise.
If you don’t have a screw extractor, you can try hammering in the stripped screw. However, this method should be used as a last resort, as it can damage the screw or the surrounding material. If you decide to hammer in a stripped screw, follow these steps:
- Choose a nail or screw that is slightly smaller than the stripped screw.
- Insert the nail or screw into the center of the stripped screw head.
- Tap the nail or screw gently with a hammer until it is firmly in place.
- Use a wrench or pliers to turn the nail or screw counterclockwise to remove the stripped screw.
Remember, hammering in a stripped screw is not a recommended method for removing screws. It can cause damage to the screw, the surrounding material, or both. If you encounter a problematic screw, try the above methods first before resorting to hammering.
Alternative Solutions to Hammering Screws
https://www.youtube.com/watch?v=S7kWPpOqU5E&embed=true
While hammering screws is possible, it is not always the best option. Here are some alternative solutions to hammering screws that you can consider:
Using a Power Drill
A power drill is a great alternative to hammering screws. It can quickly and easily drive screws into most materials, including wood, metal, and plastic. Plus, it can be used with a variety of different bits, making it a versatile tool to have in your toolbox.
Using an Electric Screwdriver
An electric screwdriver is another great alternative to hammering screws. It is a lightweight and easy-to-use tool that can quickly drive screws into most materials. It is especially useful for those who have difficulty using a manual screwdriver.
Using a Manual Screwdriver
While not as fast as a power drill or electric screwdriver, a manual screwdriver is still a reliable alternative to hammering screws. It is a simple and straightforward tool that can be used to drive screws into most materials.
Using Wall Plugs
If you need to hang something heavy on a wall, using wall plugs is a great alternative to hammering screws directly into the wall. Wall plugs are small plastic or metal inserts that are inserted into a drilled hole in the wall. They provide extra support for screws, making them ideal for hanging heavy items.
In conclusion, there are many alternative solutions to hammering screws that you can consider. Whether you choose to use a power drill, electric screwdriver, manual screwdriver, or wall plugs, each option has its own benefits and drawbacks. It is important to choose the option that best suits your needs and the materials you are working with.
DIY Projects and Safety Measures
As someone who enjoys DIY projects, I know that working with screws is a common task. While it may seem simple, it is important to take safety measures seriously to avoid injury.
One of the most important things to keep in mind when working with screws is to have a firm grip on the screwdriver or power tool. This will help you maintain control and avoid slipping, which can cause injury.
It is also important to pay attention to the angle at which you are driving the screw. Driving a screw at an angled position can cause it to strip or break, which can be frustrating and dangerous. Make sure to keep the screwdriver or power tool straight and perpendicular to the surface.
Patience is also key when working with screws. Rushing the process can lead to mistakes and accidents. Take your time and work steadily to ensure that the screw is properly installed.
In addition to these tips, there are several safety measures you should take when working with screws. Always wear eye protection to avoid flying debris or metal shavings. Use gloves to protect your hands from sharp edges and cuts. And finally, make sure to use the appropriate tool for the job. Using the wrong tool can lead to damage to the screw, the surface, or the tool itself.
By following these guidelines, you can ensure that your DIY projects are successful and safe.
Conclusion
In conclusion, hammering screws can be done, but it is not always the best option. It is important to consider the material you are working with and the type of screw you are using. For example, if you are working with hardwood, hammering a screw can cause the wood to splinter and damage the screw. Similarly, if you are working with wall or masonry, hammering a screw can cause shards of paint and plaster or brickwork to chip off.
If you do choose to hammer in a screw, it is important to use the right technique. One method is to use a screwdriver to create a pilot hole and then use a hammer to drive the screw in. Another method is to use pliers to hold the screw in place while hammering it in. However, it is important to note that hammering in a screw can cause it to be less secure than if it were drilled in properly.
Overall, it is recommended to use a drill or screwdriver to install screws whenever possible. This will ensure that the screw is properly secured and will not cause damage to the material it is being installed in. If you do not have access to a drill or screwdriver, then hammering in a screw can be a temporary solution, but it is important to be careful and use the right technique to avoid causing damage.
Frequently Asked Questions
How can I screw in a stripped screw without a drill?
If you don’t have a drill, you can still screw in a stripped screw by using a hammer and a screwdriver. First, place the screwdriver in the screw head and tap it gently with a hammer to create a small indentation. Then, apply downward pressure on the screwdriver while turning it clockwise to drive the screw in.
Is it possible to hammer out a screw?
Yes, it is possible to hammer out a screw. If you need to remove a screw but don’t have a screwdriver, you can use a hammer and a flathead screwdriver or chisel to tap the screw counterclockwise until it comes out.
Can a hammer drill be used to put in screws?
Yes, a hammer drill can be used to put in screws, but it’s not recommended. Hammer drills are designed for drilling into hard materials like concrete and masonry, and they can easily damage softer materials like wood or plastic. A regular drill with a screwdriver bit is a better option for inserting screws.
What is the best way to insert a screw into a wall plug?
To insert a screw into a wall plug, first, drill a hole slightly smaller than the plug diameter. Then, insert the plug into the hole and tap it gently with a hammer until it’s flush with the wall. Finally, screw in the screw, making sure it’s snug but not overtightened.
Is it safe to use a screw as a nail?
No, it’s not safe to use a screw as a nail. Screws are designed to hold materials together with a strong grip, while nails are designed to be driven into materials with a weaker grip. Using a screw as a nail can cause the material to split or crack, and it can be dangerous if the screw comes loose.
How can I remove a screw with stripped threads?
If a screw has stripped threads, you can remove it by using a screw extractor. First, drill a small hole into the center of the screw head. Then, insert the screw extractor into the hole and turn it counterclockwise with a wrench or pliers until the screw comes out.

Hi, I’m Sal Muller of Tooltrip.com. My DIY experience led me to understand essential power tools for home projects. Tooltrip.com guides enthusiasts and professionals in choosing right tools for any job. I provide concise top tool reviews for easier, efficient DIY.
