
Shiplap with crown molding is a popular way to add character and charm to any room. This classic combination of rustic shiplap and elegant crown molding creates a unique look that can be both modern and traditional. Whether you’re renovating a farmhouse or updating a modern home, shiplap with crown molding is a versatile option that can add value and style to any space.
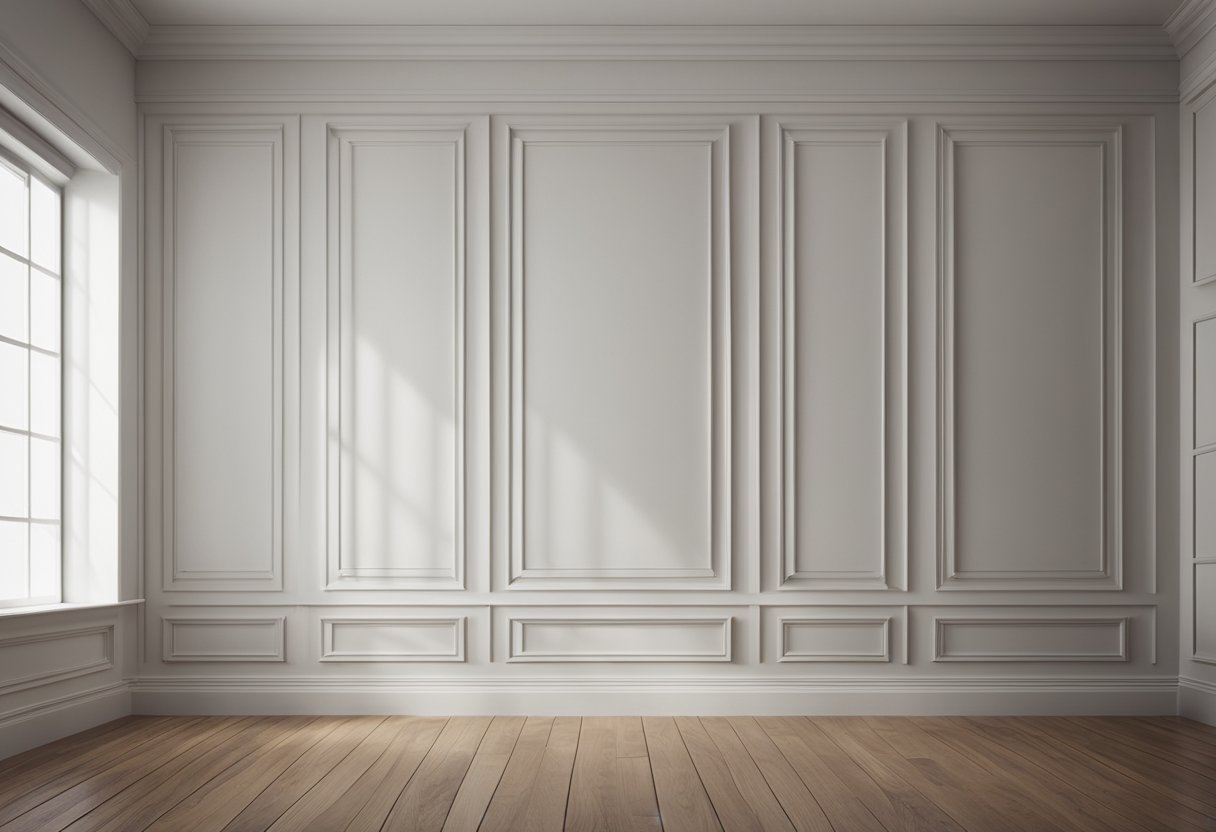
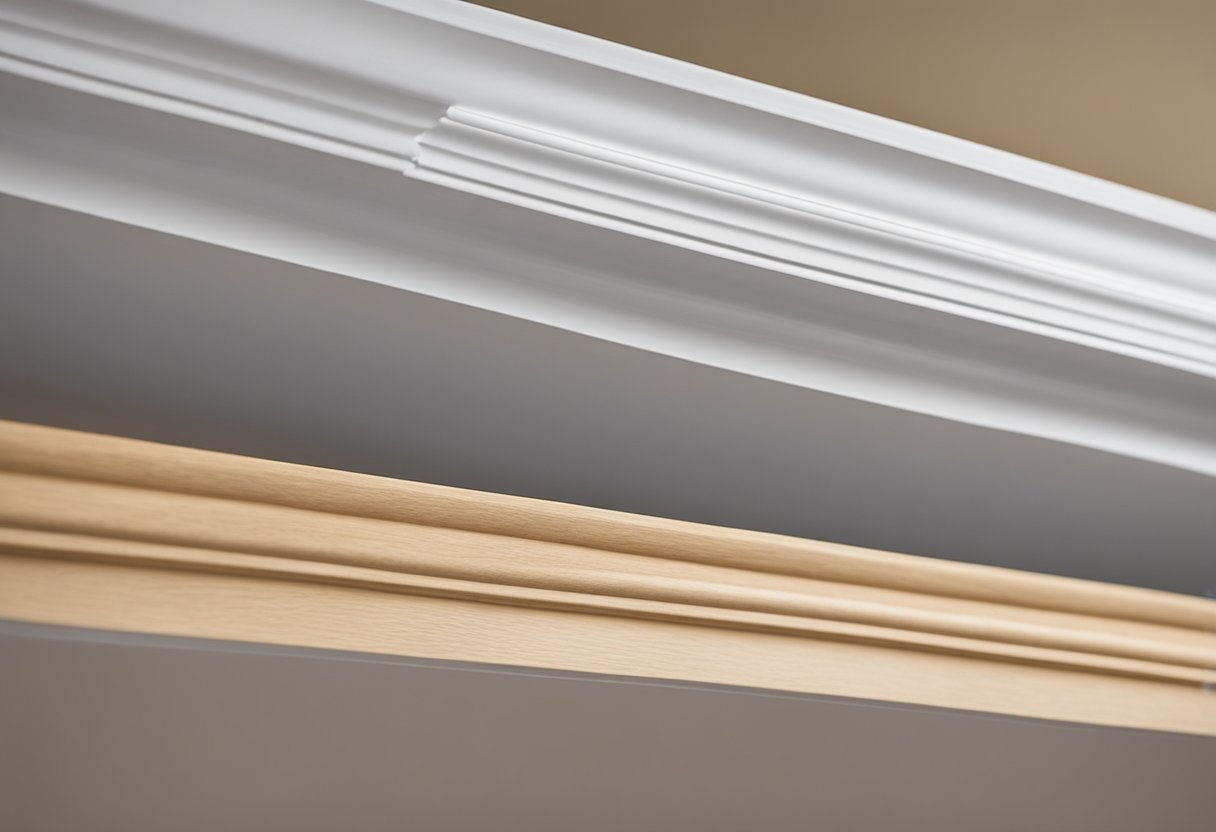
Understanding the basics of shiplap and crown molding is essential before diving into the world of shiplap with crown molding. Shiplap is a type of wooden board that has a rabbet joint on one edge and a groove on the other. This allows the boards to fit together snugly, creating a tight seal that can be painted or stained. Crown molding, on the other hand, is a decorative trim that is used to cover the seam between the ceiling and the wall. It can be made of wood, plaster, or other materials and comes in a variety of styles and sizes.
Key Takeaways
- Shiplap with crown molding is a versatile option that can add value and style to any space.
- Understanding the basics of shiplap and crown molding is essential before diving into the world of shiplap with crown molding.
- DIY shiplap with crown molding can be a cost-effective way to add character and charm to any room.
Understanding Shiplap and Crown Molding
https://www.youtube.com/watch?v=BtiedErJSDA&embed=true
As a professional interior designer, I have worked with various materials and designs, and shiplap with crown molding is one of my favorite combinations. Both shiplap and crown molding have been around for centuries and have been used in a variety of ways. In this section, I will provide a brief overview of shiplap and crown molding and how they can be used together to create a beautiful interior space.
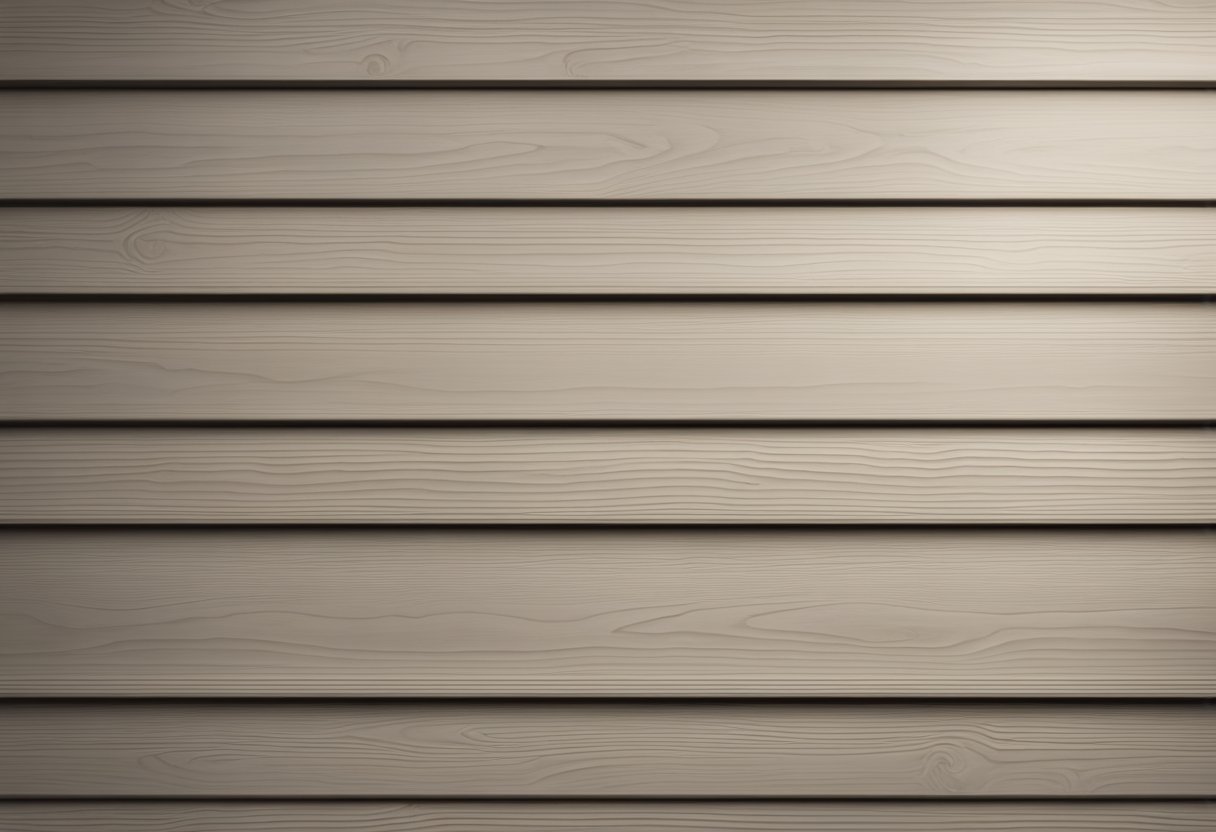
Shiplap
Shiplap is a type of wooden board that has a rabbet joint on both sides, allowing the boards to overlap each other. This creates a tight seal that makes it ideal for use in walls and ceilings. Shiplap is commonly made from materials such as pine, MDF, or cedar. Pine is the most common material used for shiplap because it is affordable and easy to work with. MDF is a more expensive option but is more durable and resistant to moisture, making it ideal for use in bathrooms and kitchens.
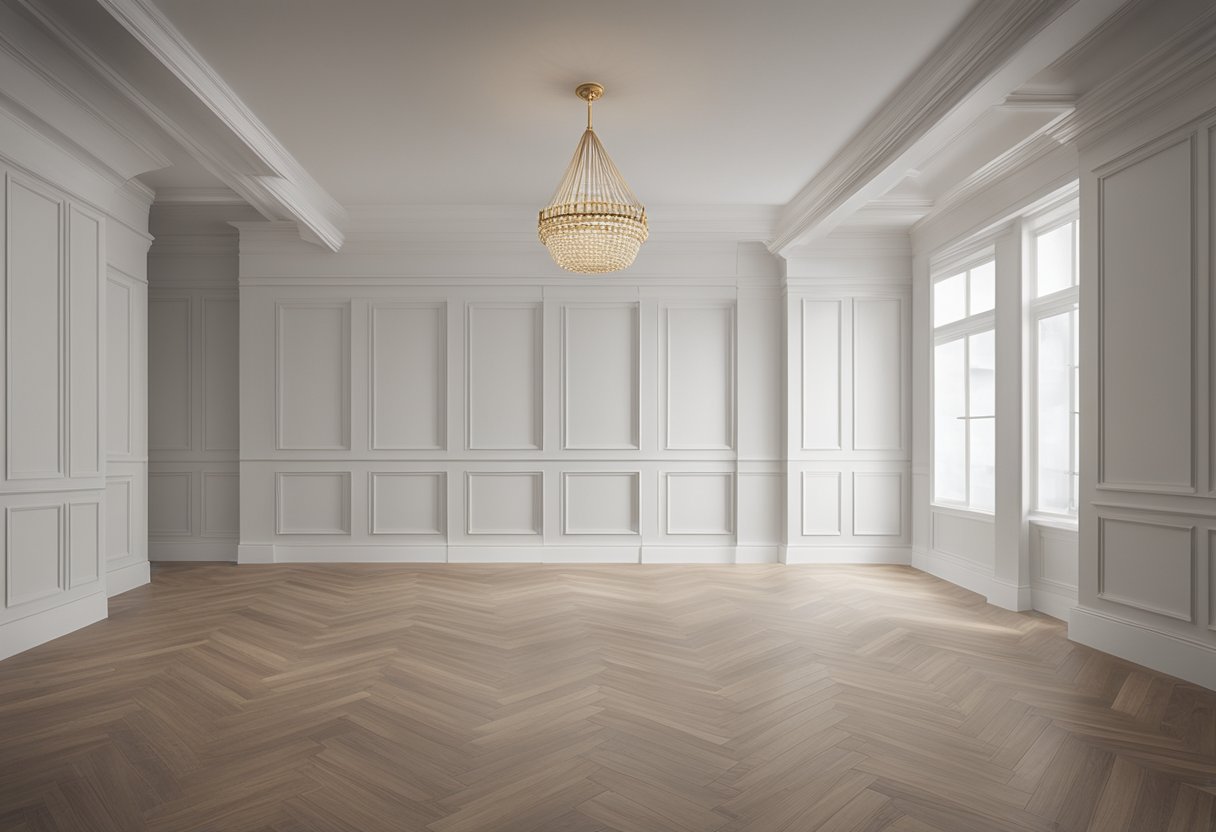
Crown Molding
Crown molding is a decorative trim that is used to cover the joint between the wall and ceiling. It is available in a variety of materials, including wood, MDF, and plaster. Crown molding can be simple or ornate, depending on the design style of the room. It is commonly used to add a touch of elegance and sophistication to a room.
Shiplap and Crown Molding
When used together, shiplap and crown molding can create a beautiful and unique look. Crown molding can be installed on top of shiplap to create a finished look. The shiplap can be painted or stained to match the crown molding or left natural for a rustic look. When choosing a crown molding style, it is important to consider the style of the room. A simple crown molding is ideal for a modern or minimalist room, while an ornate crown molding is perfect for a traditional or classic room.
In conclusion, shiplap with crown molding is a timeless combination that can add character and charm to any room. Whether you choose to use pine, MDF, or cedar for your shiplap, and wood, MDF, or plaster for your crown molding, this combination is sure to create a beautiful and unique look.
DIY Shiplap with Crown Molding
https://www.youtube.com/watch?v=PJ8AxuVVMqI&embed=true
If you’re looking to add some character and texture to your walls, shiplap is a great option. And if you’re wondering whether crown molding goes with shiplap, the answer is a resounding yes! In fact, crown molding can be a great way to finish off the top of a shiplap wall and give it a polished look.
To get started, you’ll need some basic tools like a brad nailer, miter saw, and table saw. You’ll also need to decide what type of shiplap you want to use. There are two main types of shiplap: tongue and groove, and rabbet. Tongue and groove shiplap has a groove on one edge and a tongue on the other, which allows the boards to interlock. Rabbet shiplap has a groove on both edges, which creates a channel for the boards to fit together.
Once you have your shiplap and tools ready, you can start by measuring your wall and cutting your shiplap to size. Use a brad nailer to attach the shiplap to the wall, making sure to leave a small gap between each board for expansion. You can also use construction adhesive to help hold the shiplap in place.
When it comes to adding crown molding to your shiplap wall, there are a few things to keep in mind. First, make sure your crown molding is the right size for your wall. You may need to adjust the size of your shiplap boards to accommodate the crown molding.
Next, use a miter saw to cut the corners of your crown molding at a 45-degree angle. This will allow the corners to fit together neatly. Use a brad nailer to attach the crown molding to the wall, making sure to nail it into the studs behind the wall.
Overall, adding crown molding to your shiplap wall can be a great way to give it a finished look. With the right tools and a little bit of know-how, you can create a beautiful shiplap wall with crown molding that will be the envy of all your friends and family.
Installation Process
https://www.youtube.com/watch?v=Do_HBcHmoYk&embed=true
When it comes to installing shiplap with crown molding, the process can seem daunting at first, but with the right tools and techniques, it can be a straightforward and rewarding project. Here is a step-by-step guide on how to install shiplap with existing crown molding.
Step 1: Preparation
Before you begin, it is essential to measure the width of your room and the height of your crown molding. This will help you determine how much shiplap you will need to purchase. Once you have your measurements, you can purchase the necessary materials, including shiplap panels, finishing nails, and caulk.
Step 2: Cutting Shiplap Panels
Next, you will need to cut the shiplap panels to size using a saw. If your panels are too long, you can always trim them down to size once they are installed. It is crucial to ensure that your panels fit snugly against the wall and do not overlap the crown molding.
Step 3: Installing Shiplap Panels
Once you have your shiplap panels cut to size, you can begin installing them. Start by placing your first board along the edge of the floor and make sure it is level. Use a finish nailer to attach the board to the wall at the location of each stud. Repeat this process for each shiplap panel, ensuring that each panel is level and securely attached to the wall.
Step 4: Dealing with Corners and Baseboards
When it comes to inside and outside corners, it is essential to use a miter saw to cut the shiplap panels at a 45-degree angle. This will help the panels fit snugly together and create a seamless look. You can also use quarter round molding to cover any gaps between the shiplap panels and the baseboards.
Step 5: Caulking
Finally, you will need to use caulk to fill in any gaps between the shiplap panels and the crown molding. This will help create a seamless look and prevent any drafts from entering your home. Be sure to use a high-quality caulk that is paintable and matches the color of your shiplap panels.
Overall, installing shiplap with existing crown molding requires patience and attention to detail, but with the right tools and techniques, it can be a rewarding DIY project.
Painting and Finishing Touches
https://www.youtube.com/watch?v=8x3WRvzcpOk&embed=true
Once the shiplap and crown molding have been installed, it’s time to add some finishing touches. Painting is an essential step to give your shiplap and crown molding a polished look. I recommend using a high-quality paint that is specifically designed for wood surfaces. Before painting, make sure to sand the shiplap and crown molding to ensure a smooth surface.
After painting, you may notice some gaps between the shiplap and crown molding. To fill these gaps, I suggest using paintable caulk. Apply the caulk carefully to the gaps and smooth it out with a caulk smoothing tool or your finger. Once the caulk has dried, you can paint over it to match the rest of the shiplap and crown molding.
If you’re going for a rustic look, you may want to consider distressing the shiplap and crown molding. This can be achieved by lightly sanding the edges and corners of the wood with sandpaper or a sanding block. You can also use a hammer or other tools to create dents and scratches in the wood. Just be careful not to overdo it and damage the wood.
Overall, painting and finishing touches are crucial to achieving a professional and polished look for your shiplap and crown molding. With a little effort and attention to detail, you can transform your space into a beautiful and inviting room.
Cost Considerations
When considering adding shiplap with crown molding to your home, cost is an important factor to keep in mind. The cost of installing shiplap with crown molding varies depending on several factors, including the size of the room, the materials used, and the labor costs.
The cost of materials for shiplap with crown molding is relatively affordable, with crown molding costing between $7 to $16 per linear foot, and shiplap interior installation costing around $1,000 per room, according to HomeAdvisor. However, the cost of labor can add up quickly, with installation costs ranging from $500 to $1,500 per room.
It is important to keep in mind that the cost of shiplap with crown molding can vary depending on the scope of the project. For example, installing shiplap on the exterior of a home can cost around $4,000, with a cost range between $2,800 and $7,500, depending on the project’s scope.
To keep costs down, consider installing shiplap with crown molding in smaller rooms or areas of your home, such as a feature wall in a bedroom or living room. Additionally, consider doing some of the installation work yourself if you have the necessary skills and tools, as this can save on labor costs.
Overall, while the cost of shiplap with crown molding can add up quickly, it is still an affordable way to add a touch of elegance and charm to your home. By carefully considering the costs and scope of the project, you can ensure that you get the most bang for your buck.
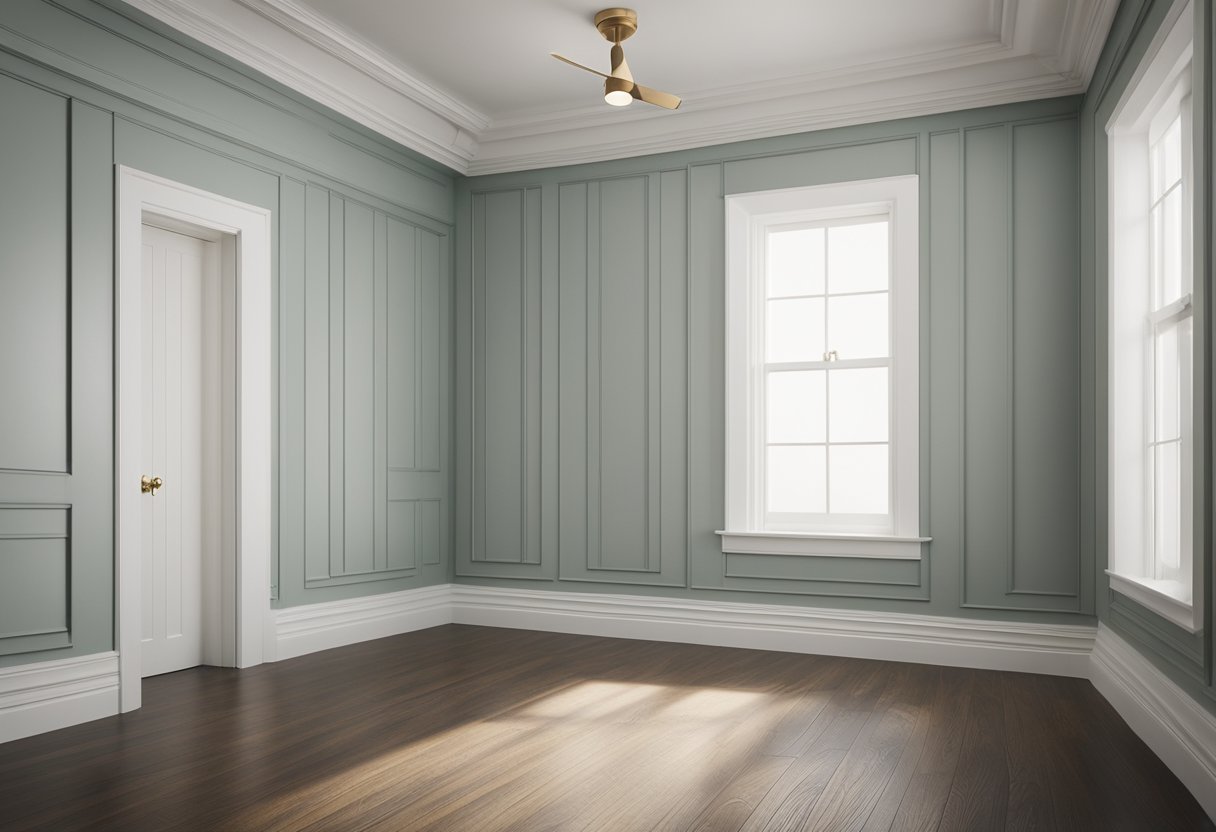
Shiplap and Crown Molding in Different Rooms
https://www.youtube.com/watch?v=JpOdp_YUcak&embed=true
As a home decor enthusiast, I have found that shiplap and crown molding can add a touch of elegance to any room. The combination of shiplap and crown molding can create a beautiful contrast that adds depth and character to the walls. In this section, I will discuss how shiplap and crown molding can be used in different rooms.
Kitchen
In the kitchen, shiplap and crown molding can be used to create a cozy and rustic feel. You can install shiplap on the walls and add crown molding to the top of the cabinets. This will create a beautiful contrast between the shiplap and the cabinets. You can also paint the shiplap and the crown molding in different colors to add more depth and character to the room.
Basement
The basement is often a neglected area of the house, but it can be transformed into a beautiful space with shiplap and crown molding. You can install shiplap on the walls and add crown molding to the ceiling. This will create a beautiful contrast between the walls and the ceiling. You can also add recessed lighting to highlight the shiplap and crown molding.
Pantry
The pantry is a small space, but it can still benefit from the addition of shiplap and crown molding. You can install shiplap on the walls and add crown molding to the top of the shelves. This will create a beautiful contrast between the shiplap and the shelves. You can also add a bold color to the shiplap to make the space more inviting.
Mudroom
The mudroom is a high-traffic area that can benefit from the durability of shiplap. You can install shiplap on the walls and add crown molding to the top of the walls. This will create a beautiful contrast between the shiplap and the walls. You can also add hooks and shelves to the shiplap to make the space more functional.
Entryway
The entryway is the first thing people see when they enter your home, so it’s important to make a good impression. You can install shiplap on the walls and add crown molding to the top of the walls. This will create a beautiful contrast between the shiplap and the walls. You can also add a bold color to the shiplap to make the space more inviting.
In conclusion, shiplap and crown molding can be used in different rooms to create a beautiful contrast and add depth and character to the walls. Whether you’re renovating your kitchen or transforming your basement, shiplap and crown molding can add a touch of elegance to any space.
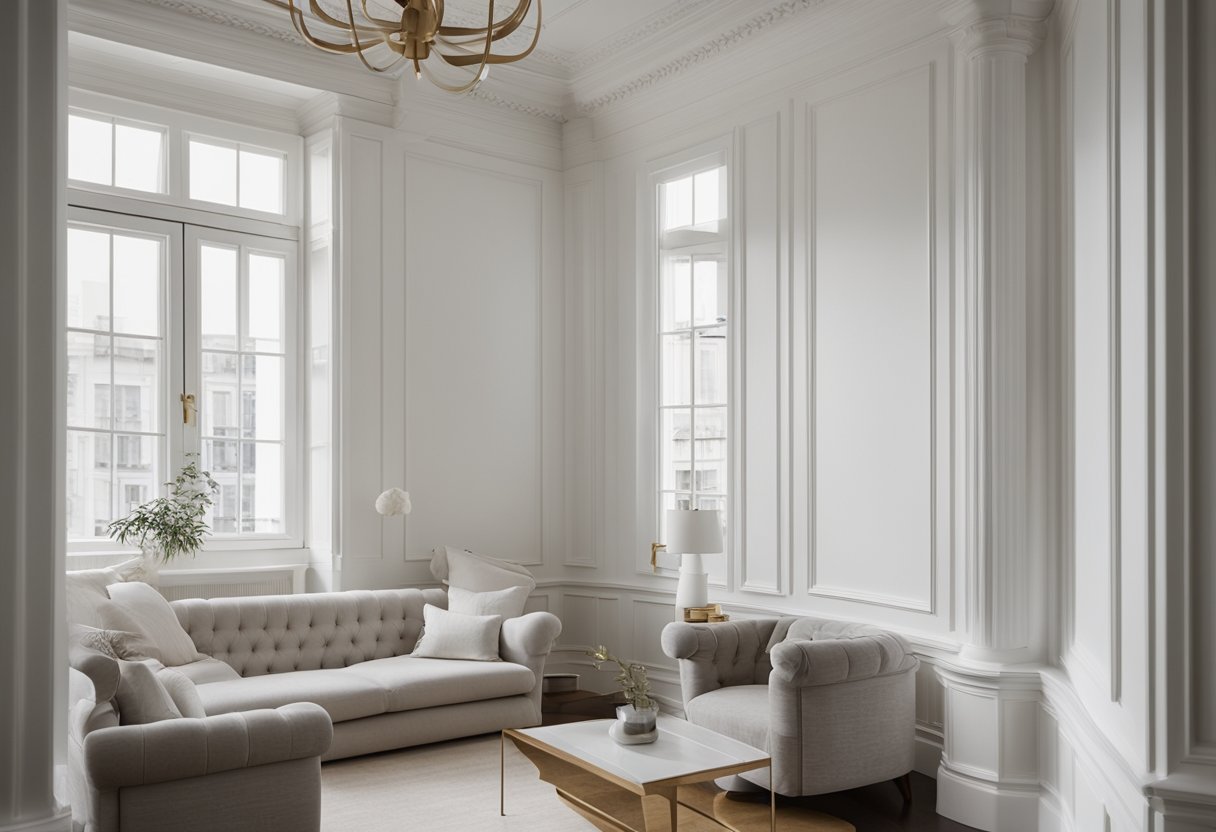
Styling and Trends
When it comes to interior design, shiplap with crown molding is a classic and timeless combination that can add personality and class to any room. This decorative ceiling trim can enhance the aesthetics of crown molding, traditionally reserved for more formal spaces, with its textured and visually pleasing backdrop.
In recent years, shiplap with crown molding has become increasingly popular, especially as an accent wall in living rooms, bedrooms, and kitchens. Many homeowners are incorporating shiplap with crown molding as a wainscot treatment, adding depth and interest to their walls. Wooden beams can also be added to the ceiling to complement this style.
Social media platforms like Pinterest and Instagram are filled with photos of shiplap with crown molding, showcasing the versatility of this design trend. From modern farmhouse to coastal chic, shiplap with crown molding can be adapted to fit any design style.
As for trends, shiplap with crown molding is expected to remain popular for years to come. According to interior design experts, the trend towards natural materials and textures will continue to shape the design landscape, with wood being a key player. Shiplap with crown molding perfectly captures this trend, offering a warm and inviting feel to any space.
In my dream home, I would love to incorporate shiplap with crown molding in my living room and kitchen. I think it would add a touch of elegance and charm to the space while still feeling cozy and inviting.
Maintenance and Care
As a homeowner, I know that maintenance and care are essential to keep shiplap with crown molding looking its best. Here are some tips to help you keep your shiplap walls and crown molding in excellent condition.
Cleaning
Regular cleaning is essential to maintain the beauty of your shiplap walls and crown molding. Dust and dirt can accumulate on the surface, which can make it look dull and unattractive. I recommend using a soft cloth or a duster to remove any dust or dirt from the surface. If you need to remove any stubborn stains, use a mild soap solution and a soft-bristled brush to scrub the surface. Avoid using harsh chemicals or abrasive cleaners as they can damage the paint or finish.
Repairs
Over time, your shiplap walls and crown molding may develop cracks or chips. It’s essential to address these issues promptly to prevent further damage. If you notice any cracks or chips, use a wood filler to fill the gaps and sand the surface to make it smooth. After the filler has dried, paint or stain the surface to match the surrounding area.
Protection
To protect your shiplap walls and crown molding, I recommend applying a protective coat of paint or stain. This will help to prevent moisture from penetrating the surface, which can cause damage over time. Additionally, you can use a sealer to protect the surface from scratches, stains, and other types of damage.
Conclusion
By following these simple tips, you can keep your shiplap walls and crown molding looking beautiful for years to come. Remember to clean the surface regularly, address any repairs promptly, and protect the surface with a coat of paint or stain. With proper maintenance and care, your shiplap walls and crown molding will be the envy of all your friends and family.
Common Mistakes and Troubleshooting
When it comes to installing shiplap with crown molding, there are a few common mistakes you want to avoid. Here are some tips to help you troubleshoot any issues that may arise during the installation process.
Mistake #1: Installing Crown Molding Before Shiplap
One of the most common mistakes when installing shiplap with crown molding is installing the crown molding before the shiplap. This can make it difficult to fit the shiplap pieces around the crown molding, and you may end up with unsightly gaps or uneven edges. To avoid this, always install your shiplap before your crown molding.
Mistake #2: Using Wallpaper as Shiplap
While wallpaper may look like shiplap, it is not a suitable substitute for real shiplap. Wallpaper is not as durable as real shiplap, and it can easily peel or become damaged over time. If you want the authentic look of shiplap, it’s best to invest in real shiplap siding.
Mistake #3: Not Using the Right Crown Molding
Using the wrong type of crown molding can also cause problems when installing shiplap. Make sure you choose a crown molding that is the right size and style for your shiplap, and that it is installed correctly. If you’re not sure which type of crown molding to use, consult with a professional or do some research online.
Troubleshooting Tips
If you do encounter problems during the installation process, here are some troubleshooting tips to help you fix them:
- If your shiplap pieces are not lining up correctly, double-check your measurements and make sure you’re cutting the pieces at the right angles.
- If you’re having trouble fitting your shiplap around windows or doors, use a jigsaw to notch the pieces to fit.
- If you notice gaps between your shiplap pieces, use wood filler to fill them in before painting or staining.
- If your crown molding is not fitting correctly, make sure it is the right size and style for your shiplap, and that it is installed correctly.
By avoiding these common mistakes and following these troubleshooting tips, you can ensure a successful installation of shiplap with crown molding.
Frequently Asked Questions
How do you install crown molding on shiplap walls?
Installing crown molding on shiplap walls is a great way to add a finishing touch to your room. The process involves removing the existing molding, installing the shiplap, and then re-installing the crown molding. To ensure a seamless transition between the shiplap and the crown molding, it is important to measure and cut the molding precisely. You can use a coping saw to create a tight fit between the crown molding and the shiplap. Alternatively, you can use corner blocks or rosettes to create a decorative transition between the two.
What are some ideas for shiplap ceiling trim?
Shiplap ceiling trim can add a lot of character to a room. One popular option is to install crown molding around the perimeter of the ceiling. This will create a finished look and help to define the space. Another option is to install a ceiling medallion in the center of the ceiling. This can be a great way to add a decorative element to the room. You can also use beams or planks to create a coffered ceiling effect.
What are some creative trim options for shiplap?
Shiplap is a versatile material that can be used in a variety of ways. One creative option is to install shiplap vertically instead of horizontally. This can create a unique look that adds visual interest to the room. Another option is to use different types of molding to create a layered effect. For example, you can install a baseboard, chair rail, and crown molding in a room with shiplap walls. This will create a sense of depth and dimension.
Can shiplap be used with other types of molding?
Yes, shiplap can be used with other types of molding. In fact, using multiple types of molding can create a more interesting and dynamic look. You can use baseboards, chair rails, and crown molding in combination with shiplap to create a layered effect. Just be sure to choose molding that complements the style and color of your shiplap.
Is shiplap still a popular choice for interior design?
Yes, shiplap is still a popular choice for interior design. It is a timeless material that can add character and warmth to any room. Shiplap can be used in a variety of ways, from accent walls to entire rooms. It is a versatile material that can be painted or stained to match any style.
Should baseboards be removed when installing shiplap?
It is not necessary to remove baseboards when installing shiplap, but it can make the installation process easier. Removing the baseboards will allow you to install the shiplap flush against the wall. If you choose not to remove the baseboards, you can install the shiplap on top of them. Just be sure to use a spacer to create a gap between the shiplap and the baseboard, so that the shiplap can expand and contract with changes in humidity.

Hi, I’m Sal Muller of Tooltrip.com. My DIY experience led me to understand essential power tools for home projects. Tooltrip.com guides enthusiasts and professionals in choosing right tools for any job. I provide concise top tool reviews for easier, efficient DIY.
