
Copying a curve shape into wood can be a challenging task, but with the right tools and techniques, it can be done with ease. Whether you are a beginner or an experienced woodworker, this article will guide you through the process of copying a curve shape into wood.

To copy a curve shape into wood, you will need to understand the basics of curve shapes and the materials required for the task. Creating a template, transferring the curve to wood, cutting the curve, refining the curve, and adding final touches are all crucial steps in the process. Additionally, it is important to take safety precautions to avoid any accidents or injuries.
In this article, I will provide you with step-by-step instructions on how to copy a curve shape into wood. By following these instructions, you will be able to create a precise and accurate curve shape that will enhance the beauty and functionality of your woodworking projects.
Understanding Curve Shapes
As a woodworker, understanding curve shapes is crucial when it comes to copying them into wood. A curve is a line that bends or deviates from a straight path. It can be a simple curve, like a circle, or a complex curve, like a spiral.
The radius of a curve is the distance from the center of the curve to any point on the curve. This is important to know when copying a curve shape into wood because it determines the size of the curve you need to create.
An arc is a portion of a curve that is defined by two endpoints and a radius. When copying a curve shape into wood, it’s important to understand how to create an arc because many curve shapes are made up of multiple arcs.
There are several methods for copying curve shapes into wood, and the method you choose will depend on the complexity of the curve shape you’re working with. Some popular methods include using a template, a flexible ruler, or a compass.
When working with curves, accuracy is key. Even a small deviation from the original curve shape can result in a noticeable flaw in your finished product. Taking the time to understand curve shapes and the methods for copying them into wood will help you achieve the desired outcome and create a high-quality finished product.
Materials Required
When it comes to copying a curve shape into wood, there are a few materials that you’ll need to get started. In this section, I will discuss the materials that are required for this project.
Choosing the Right Wood
The first thing you’ll need is the right type of wood. It’s important to choose a wood that is easy to work with and can hold the shape of the curve. Plywood, plastic wood, and scrap wood are all good options for this project. Plywood is a popular choice because it’s affordable and readily available. Plastic wood is also a good option because it’s easy to work with and can be shaped easily. Scrap wood can be a great option if you have some lying around, but make sure it’s not too thin or brittle.
Essential Tools
In addition to the right type of wood, you’ll also need some essential tools. These tools will help you create the curve shape and transfer it onto the wood. Here are the tools you’ll need:
-
Compass: A compass is a tool that is used to draw circles. It’s an essential tool for creating a curve shape in wood.
-
Flexible Curve Ruler: A flexible curve ruler is a tool that is used to measure and draw curves. It’s an essential tool for transferring the curve shape onto the wood.
-
Pencil: A pencil is used to mark the curve shape onto the wood.
-
Jigsaw: A jigsaw is a power tool that is used to cut the wood into the desired shape. It’s an essential tool for cutting out the curve shape.
-
Sandpaper: Sandpaper is used to smooth out the edges of the wood after it has been cut.
In conclusion, choosing the right materials and tools is essential for copying a curve shape into wood. Plywood, plastic wood, and scrap wood are good options for the wood, while a compass, flexible curve ruler, pencil, jigsaw, and sandpaper are the essential tools you’ll need. With these materials and tools, you’ll be well on your way to creating a beautiful curve shape in wood.
Creating a Template
When it comes to copying a curve shape into wood, creating a template is an essential step. A template is a pattern or outline that you can use to trace the curve onto the wood. Here’s how to create a template:
Drawing the Curve
The first step is to draw the curve shape that you want to copy onto a piece of cardboard or a thin piece of paper. You can use a pencil or a marker to draw the curve. If you’re not confident in your drawing skills, you can print out a picture of the curve and trace it onto the cardboard or paper.
Cutting the Template
Once you have drawn the curve, you need to cut out the template. You can use scissors or a craft knife to cut along the lines of the curve. Make sure that the edges are smooth and clean.
Using a Compass
If you need to create a circular curve, you can use a compass to draw the curve onto the cardboard or paper. A compass is a tool that allows you to draw perfect circles. You can adjust the width of the compass to match the size of the curve you want to create.
Using a Beam Compass
If you need to create a large curve, you can use a beam compass. A beam compass is a tool that allows you to draw large curves. It consists of two arms that are connected by a beam. You can adjust the length of the beam to match the size of the curve you want to create.
Using Tape
If you’re having trouble keeping the template in place while you trace the curve onto the wood, you can use a thin piece of paper or tape to hold it in place. Simply tape the template to the wood and trace the curve onto the wood.
Creating a template is an important step in copying a curve shape into wood. It allows you to accurately trace the curve onto the wood and create a perfect copy of the original curve. With a few simple tools, you can create a template that will make the rest of the process much easier.
Transferring the Curve to Wood
Once you have created the template for the curve shape you want to copy onto wood, the next step is to transfer it onto the workpiece. There are a few methods you can use to do this, and I’ll cover two of the most common ones below.
Positioning the Template
First, you need to position the template on the workpiece. Place the template on the wood and align it in the desired location. You can use clamps or double-sided tape to hold the template in place.
Marking the Curve
Once the template is in position, you can mark the curve on the wood. There are a few tools you can use for this, such as a pencil, marker, or scribe.
If you’re using a pencil or marker, trace the curve onto the wood by running the writing utensil along the edge of the template. Make sure to apply enough pressure to leave a visible mark on the wood.
If you’re using a scribe, place the scribe along the edge of the template and run it along the wood to create a groove. This will make it easier to see where you need to cut.
No matter which tool you use, make sure to mark the curve as accurately as possible. Once the curve is marked, you can move on to cutting the wood to match the template.
By following these steps, you can easily transfer a curve shape onto wood and create a precise cut.
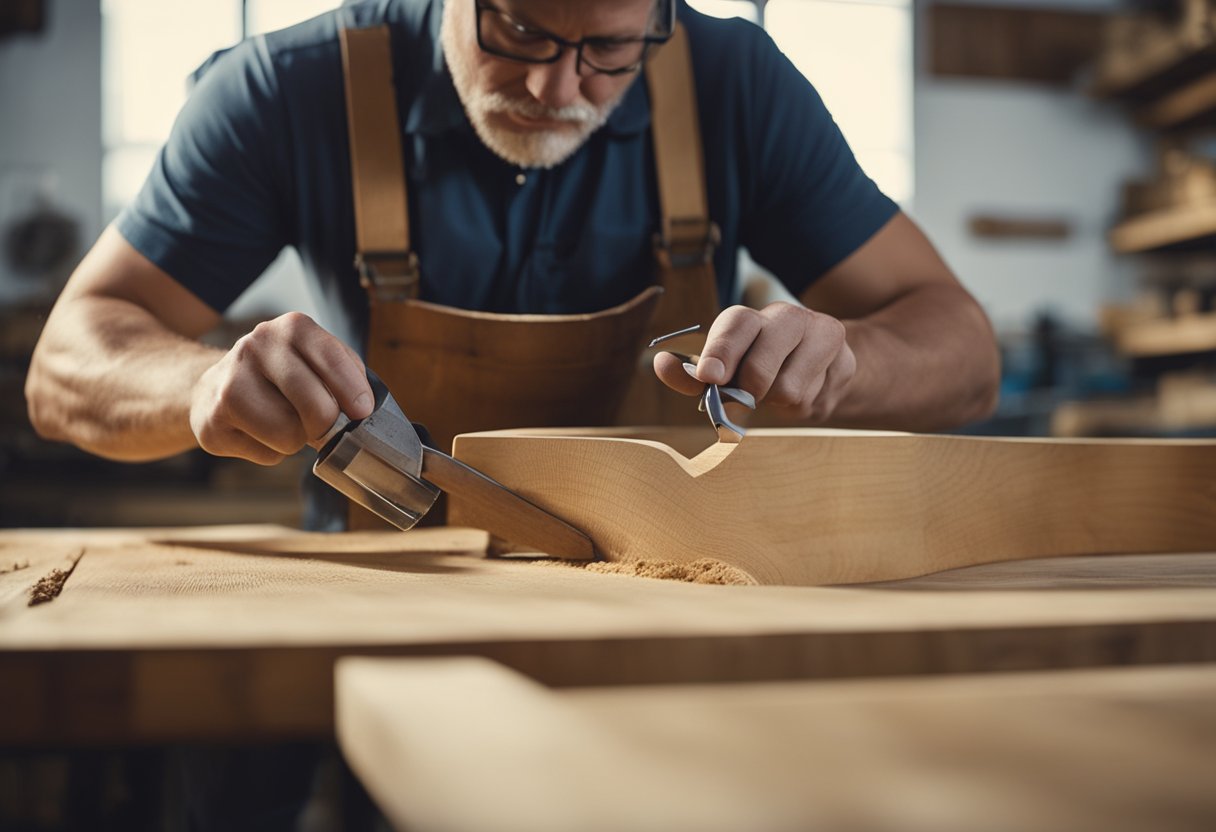
Cutting the Curve
Cutting curves in wood can be challenging, but with the right tools and techniques, it can be done quickly and accurately. In this section, I will cover three different methods for cutting curves into wood: using a jigsaw, a band saw, and a circular saw.
Using a Jigsaw
A jigsaw is a versatile saw that can be used to cut curves in wood. To cut a curve using a jigsaw, you will need to start by marking the curve on your piece of wood. Once you have marked the curve, clamp the wood to a workbench or sawhorse. Then, insert the blade into the jigsaw and turn it on. Carefully follow the curve you marked, using a steady hand to guide the saw. Be sure to keep the blade perpendicular to the wood to ensure a smooth cut.
Using a Band Saw
A band saw is another great tool for cutting curves in wood. To use a band saw, start by marking the curve on your piece of wood. Then, adjust the blade guide on the band saw to the appropriate height for your cut. Turn on the saw and carefully feed the wood through the blade, following the curve you marked. Be sure to keep your hands clear of the blade and use a push stick to guide the wood through the saw.
Using a Circular Saw
While a circular saw is not typically used for cutting curves, it can be done with the right technique. To cut a curve with a circular saw, you will need to start by marking the curve on your piece of wood. Then, set the saw blade depth to the appropriate height for your cut. Turn on the saw and carefully follow the curve you marked, using a steady hand to guide the saw. Be sure to keep the blade perpendicular to the wood to ensure a smooth cut.
In conclusion, cutting curves in wood can be done with a variety of saws, each with its own advantages and disadvantages. Whether you choose to use a jigsaw, a band saw, or a circular saw, be sure to follow the appropriate safety precautions and take your time to ensure an accurate and smooth cut.
Refining the Curve
After copying the curve shape onto the wood, it is time to refine it to achieve a smooth and polished finish. This process involves sanding and filing the curve to remove any rough edges and imperfections. Here are some ways to refine the curve:
Sanding the Curve
Using sandpaper is an effective way to smooth out the curve and achieve a polished finish. Start with a coarse grit sandpaper and work your way up to a finer grit to achieve the desired smoothness. Use a sanding block or a random orbital sander for better control and even sanding.
When sanding the curve, it is essential to keep the sandpaper flat against the curve to avoid creating flat spots or uneven surfaces. Move the sandpaper in a circular motion or follow the curve’s direction to achieve a smooth and even finish.
Filing the Curve
Filing the curve is another way to refine the shape and remove any rough edges or bumps. A rasp or a file is a useful tool for this process. A rasp is a rough file with large teeth, while a file has smaller teeth and is used for finer work.
When filing the curve, it is important to use the right tool for the job. A rasp is ideal for removing large amounts of material quickly, while a file is better for finer work and achieving a polished finish. Use a light touch when filing and follow the curve’s direction to avoid creating flat spots or uneven surfaces.
In conclusion, refining the curve is an essential step in achieving a smooth and polished finish. Sanding and filing are effective ways to remove any rough edges and imperfections. Use the right tools and techniques to achieve the desired result.
Final Touches

After successfully copying a curve shape into wood, the final touches are crucial to ensure a polished and professional look for your carpentry project. Here are some final touches that I recommend:
Sanding
Sanding is an essential step in any carpentry or DIY project, and it’s no different when copying a curve shape into wood. Use sandpaper with a fine grit to smooth out any rough edges or imperfections in the wood. Sand in the direction of the grain to avoid scratching the wood.
Staining or Painting
If you want to add some color to your wood, staining or painting is the way to go. Staining will enhance the natural beauty of the wood grain, while painting will allow you to add any color you desire. Make sure to apply the stain or paint evenly and follow the manufacturer’s instructions for drying time.
Sealing
To protect your wood from moisture and other environmental factors, it’s important to seal it. Use a clear sealer to maintain the natural look of the wood, or choose a colored sealer for a unique finish. Apply the sealer evenly and allow it to dry completely before handling the wood.
Using Hand Tools
Copying a curve shape into wood can be done using various techniques and tools. While power tools can make the job easier, hand tools can also be used for a more traditional approach. Some hand tools that can be used include a coping saw, hand plane, and chisels. Make sure to use the appropriate tool for the job and follow proper safety precautions.
Overall, copying a curve shape into wood can be a challenging but rewarding carpentry project. With the right technique and tools, you can create a beautiful and unique piece of woodworking.
Safety Precautions

When working with wood, it is important to take safety precautions to avoid injuries. Here are some safety tips to keep in mind when copying a curve shape into wood:
Wear Protective Gear
Before starting any woodworking project, it is important to wear protective gear such as safety glasses, gloves, and a dust mask. This will help prevent injuries and keep you safe from wood dust and debris.
Secure the Wood
When copying a curve shape into wood, it is important to properly secure the wood to prevent it from moving while you work. You can use clamps or a vise to hold the wood in place.
Use the Right Tools
Using the right tools is crucial when copying a curve shape into wood. A bandsaw is the best tool for making curve cuts, as it is more accurate and efficient than a coping saw or a jigsaw. If you need to make intricate cuts, you can use a scroll saw or a router.
Be Mindful of the Drill
If you need to drill a hole in the wood, make sure to use a drill bit that is the right size for the hole you need to make. Always hold the drill with both hands and keep your fingers away from the drill bit. Additionally, make sure to keep the drill bit sharp to prevent it from slipping.
Keep the Work Area Clean
Keeping your work area clean is important to prevent accidents. Make sure to clean up sawdust and wood debris regularly to prevent slipping and tripping hazards.
By following these safety precautions, you can ensure that you have a safe and successful woodworking project.
Frequently Asked Questions

What is the best tool for cutting curves in wood?
There are several tools that can be used to cut curves in wood. The most popular ones are jigsaws, bandsaws, and scroll saws. Among these, the bandsaw is considered the best tool for cutting curves in wood. It is versatile, precise, and can handle thick stock.
How can I transfer a curved shape onto wood?
Transferring a curved shape onto wood can be done using various methods. One of the easiest ways is to use a flexible curve ruler to trace the shape onto the wood. Another method is to create a template of the curve using cardboard or poster board, and then trace the template onto the wood.
What is the process for creating a curved surface template?
To create a curved surface template, you need to first determine the shape and size of the curve. Then, you can use a flexible curve ruler or a compass to draw the curve onto cardboard or poster board. Once the curve is drawn, you can cut it out using scissors or a utility knife. The template can then be used to transfer the curve onto the wood.
How do I cut a perfect arch in wood?
Cutting a perfect arch in wood requires precision and accuracy. One way to achieve this is to use a bandsaw with a fence or a jig to guide the cut. Another method is to use a router with a template guide or a circle-cutting jig. It is important to take your time and make sure the cut is accurate.
What are some techniques for copying a curve to cut wood?
There are several techniques for copying a curve to cut wood. One method is to use a tracing wheel to transfer the curve onto the wood. Another method is to use a flexible curve ruler to trace the curve onto the wood. You can also create a template of the curve using cardboard or poster board, and then trace the template onto the wood.
How do I make curved shapes in wood?
Making curved shapes in wood can be done using various methods. One way is to use a bandsaw or a scroll saw to cut the curve. Another method is to use a router with a template guide or a circle-cutting jig. It is important to take your time and make sure the cut is accurate.

Hi, I’m Sal Muller of Tooltrip.com. My DIY experience led me to understand essential power tools for home projects. Tooltrip.com guides enthusiasts and professionals in choosing right tools for any job. I provide concise top tool reviews for easier, efficient DIY.
