
Attaching pergola rafters is a crucial step in building a pergola, which is an outdoor structure designed to provide shade and support climbing plants. The rafters are the horizontal beams that form the roof of the pergola and are typically attached to the support posts or beams using brackets, screws, or bolts. In this article, I will guide you through the process of attaching pergola rafters, from selecting the right tools and materials to finishing touches and maintenance.
Understanding pergola components is essential before starting any installation process. A pergola is made up of several key components, including posts, beams, rafters, and lattice. The posts are vertical supports that anchor the structure to the ground, while the beams are horizontal elements that connect the posts and support the rafters. The rafters, as mentioned earlier, form the roof of the pergola, and the lattice is a decorative element that provides additional shade and support for climbing plants.
Key Takeaways
- Understanding the components of a pergola is crucial before starting any installation process.
- Selecting the right tools and materials is essential for attaching pergola rafters.
- Proper maintenance and safety considerations can extend the life of your pergola.
Understanding Pergola Components
When building a pergola, it is essential to understand the various components that go into its construction. Knowing the different parts of a pergola will help you make informed decisions about the type of materials to use and how to attach the rafters.
Posts
Posts are the vertical supports that hold the pergola up. They are typically made of wood, vinyl, or aluminum. Cedar is a popular choice for wood posts because of its durability and resistance to rot and insects. Vinyl and aluminum posts are also popular because they are low maintenance and come in a variety of colors.
Beams
Beams are the horizontal supports that connect the posts. They run parallel to the ledger board and support the rafters. Beams can be made of the same materials as posts, and they come in different sizes and shapes.
Crossbeams
Crossbeams are the smaller horizontal supports that run perpendicular to the beams. They provide additional support for the rafters and help distribute the weight of the structure evenly.
Ledger Board
The ledger board is a horizontal board that attaches the pergola to the house. It is typically attached to the house using lag bolts and provides additional support for the structure. The ledger board should be made of the same material as the rest of the pergola and should be at least 2 inches thick.
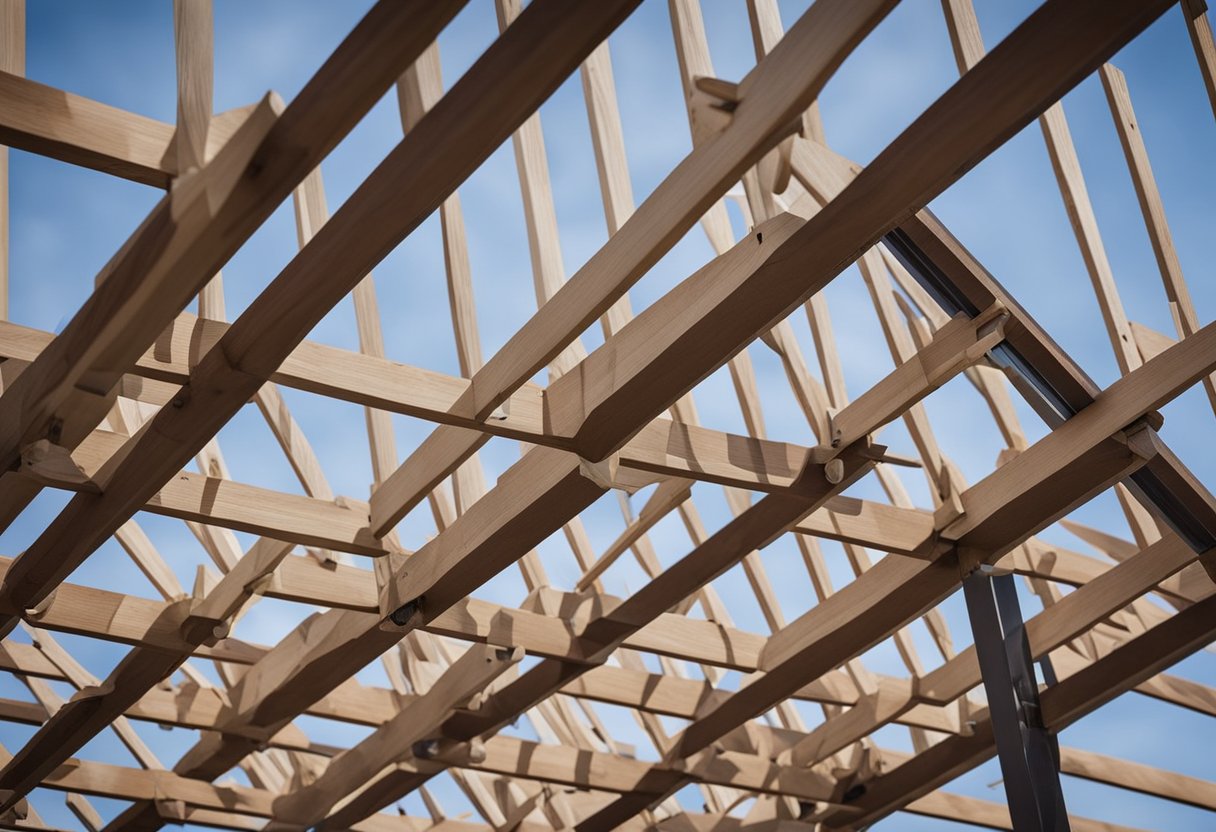
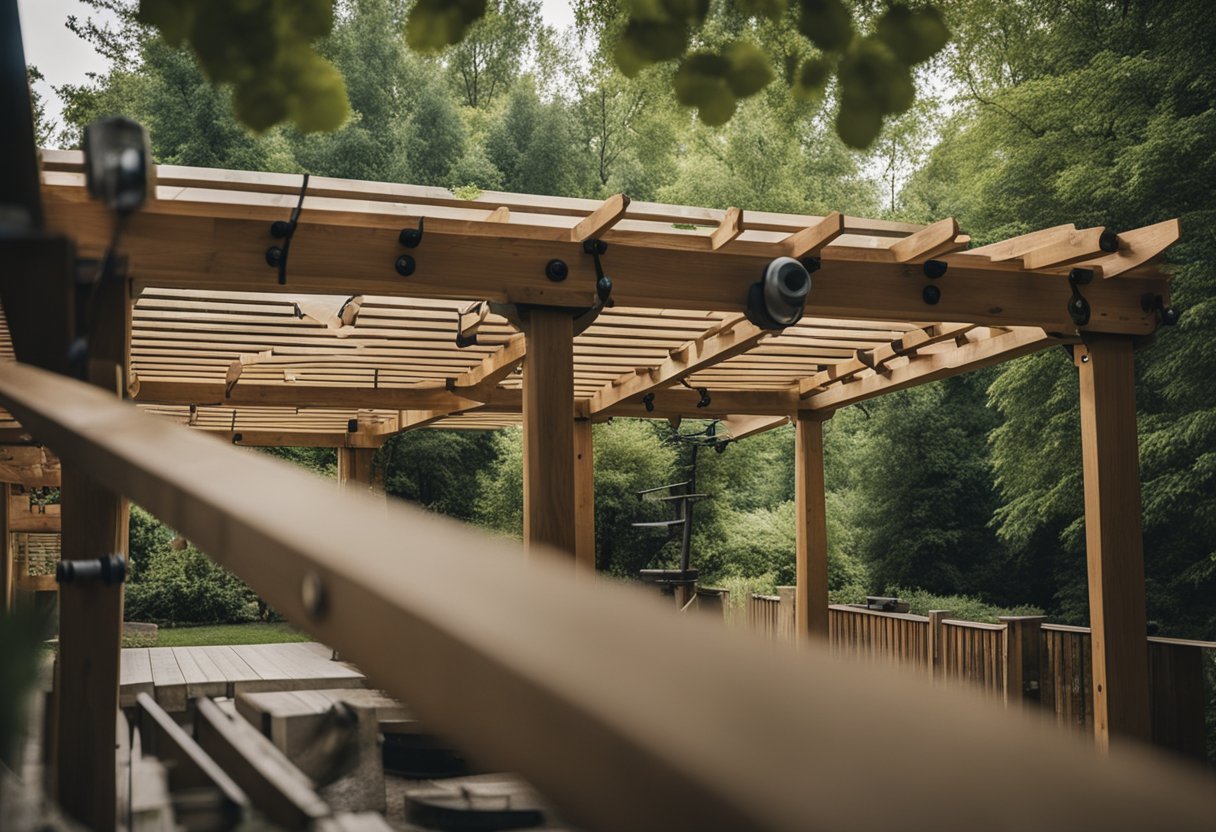
Rafters
Rafters are the diagonal or sloping beams that run perpendicular to the beams and crossbeams. They provide shade and support for climbing plants. Rafters can be made of the same materials as beams and posts, and they come in different sizes and shapes.
Lumber
Lumber is the most common material used to build a pergola. It is affordable and easy to work with. Cedar is a popular choice for lumber because of its durability and resistance to rot and insects. However, other types of wood, such as redwood and pressure-treated pine, can also be used.
Cedar
Cedar is a popular choice for pergola construction because of its durability and resistance to rot and insects. It is also lightweight and easy to work with. Cedar can be left untreated or stained to match the color of the rest of the pergola.
Vinyl
Vinyl is a low-maintenance material that is resistant to rot and insects. It comes in a variety of colors and can be made to look like wood. Vinyl is lightweight and easy to work with, making it an excellent choice for DIY projects.
Aluminum
Aluminum is a lightweight and durable material that is resistant to rust and corrosion. It comes in a variety of colors and can be made to look like wood. Aluminum is easy to work with and requires little maintenance, making it an excellent choice for pergola construction.
Selecting the Right Tools and Materials
When it comes to attaching pergola rafters, it’s crucial to have all the necessary tools and materials to get the job done right. Here are the essential items you’ll need:
Tools
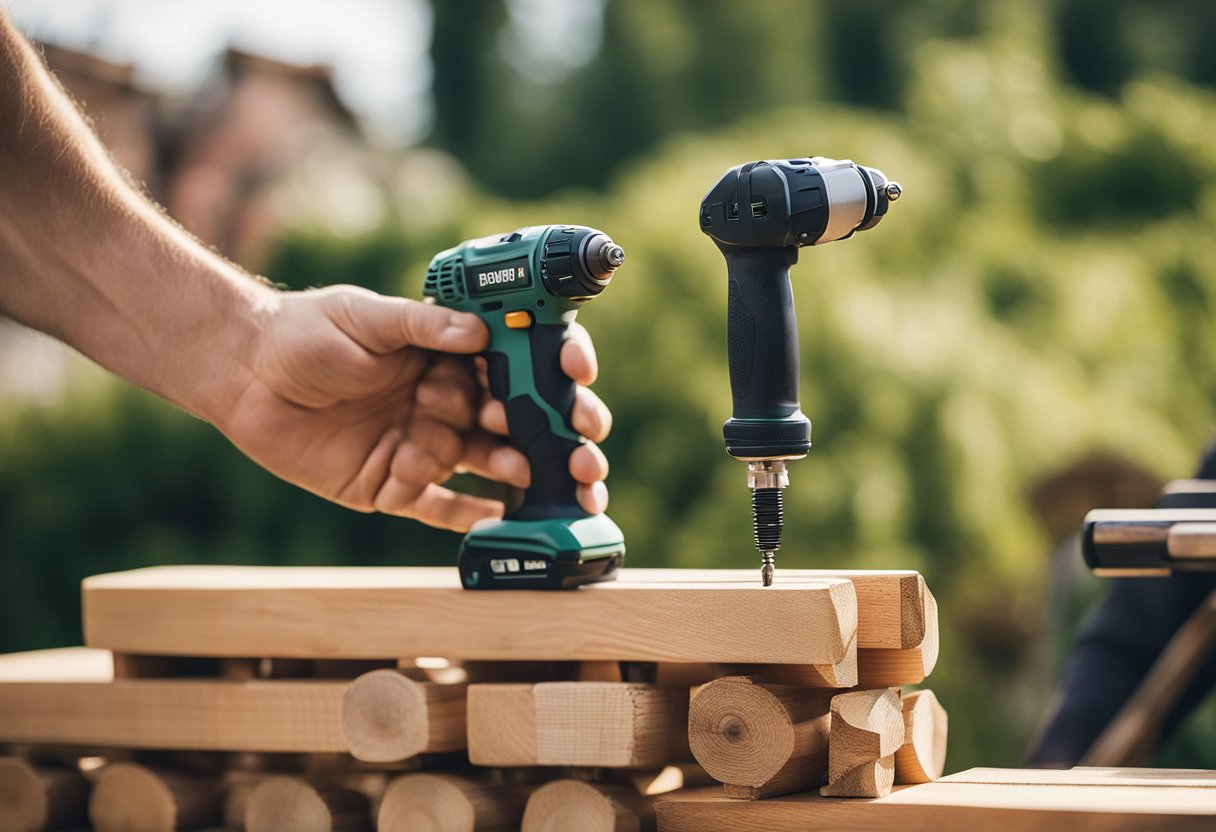
- Drill
- Saw (circular saw, jigsaw, or miter saw)
- Level
- Measuring tape
- Hammer
- Ladder or scaffolding
- Plumb bob (optional)
Materials
- Pergola kit or pre-cut rafters
- Lag screws or lag bolts
- Fasteners (nails or screws)
- Metal brackets or joist hangers (optional)
- Washers (if using lag screws)
Before starting the project, make sure you have all the necessary tools and materials on hand. This will save you time and ensure that you don’t have to make any unnecessary trips to the hardware store.
When selecting the tools, make sure they are appropriate for the job. For example, a circular saw is great for making straight cuts, while a jigsaw is better for curved cuts. A miter saw is ideal for making angled cuts.
It’s also important to choose the right type of fasteners. Lag screws or lag bolts are recommended for attaching the rafters to the beams, while nails or screws are ideal for attaching the brackets or hangers.
In addition to the tools and materials listed above, you may also need to use a plumb bob to ensure that the posts are perfectly vertical. However, this is optional and not necessary for all pergola designs.
Overall, selecting the right tools and materials is essential for a successful pergola rafter installation. With the right equipment and materials, you can ensure that your pergola is sturdy, secure, and long-lasting.
Preparing for Pergola Installation
https://www.youtube.com/watch?v=1Ke-zYmEVow&embed=true
Before installing a pergola, it’s essential to prepare the area to ensure a smooth installation process. Here are some steps to follow:
1. Check Local Building Codes
Before starting, ensure that you are following the local building codes. Check with your local building department to learn about the requirements for your area. This will help you avoid any legal issues in the future.
2. Choose the Right Location
Select the location where you want to install your pergola. Consider the size of the outdoor space, patio or backyard, and the design and style of your pergola. Ensure that the location is suitable for the pergola size and design.
3. Mark and Measure the Area
Mark the area where you want to install your pergola. Use accurate measurements to ensure that the pergola is level and properly positioned. Measure twice and cut once.
4. Pre-drill Pilot Holes
Pre-drilling holes in the rafters and beams before attaching them will help prevent the wood from splitting. Use a drill bit slightly smaller than the screws you will be using.
5. Position the Rafters
Position the rafters accurately, ensuring that they are evenly spaced. Use a level to ensure that the rafters are level and straight.
By following these steps, you can prepare for the installation of your pergola and ensure a successful installation process.
Installing the Pergola Rafters
https://www.youtube.com/watch?v=YIC5dmampk4&embed=true
Now that the support posts and beams are securely anchored and level, it’s time to install the pergola rafters. The rafters are the horizontal beams that will be attached to the top of the pergola, providing the structure for the roof.
Before installing the rafters, it’s important to ensure that they are cut to the proper length and angle. Using a spirit level, I checked that the beams were level before attaching the rafters. If the beams are not level, the rafters will not be level either, which can cause problems with the overall structure.
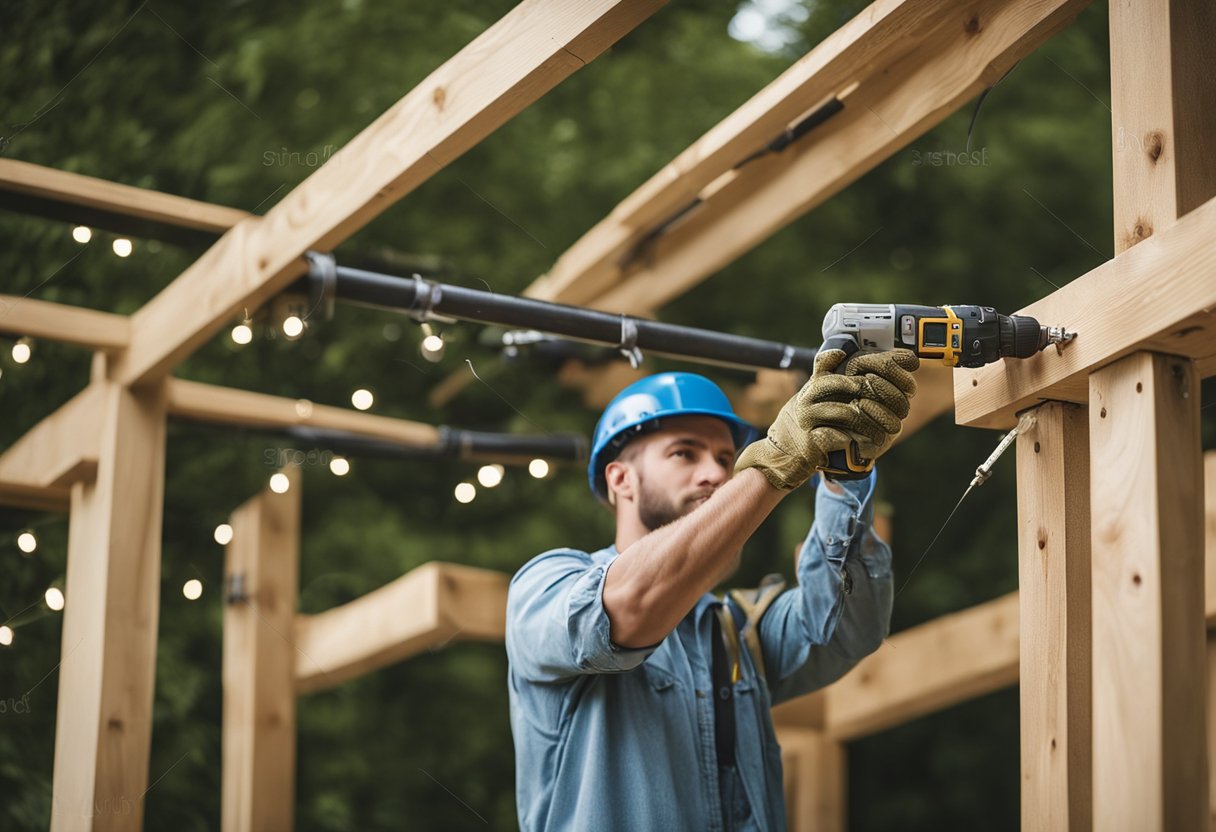
To attach the rafters to the beams, I used metal post brackets and screws. The brackets provide a secure connection between the rafters and beams, which is important for added support. I made sure to space the brackets evenly along the length of the beam to ensure that the weight of the roof is evenly distributed.
When attaching the brackets, I made sure to use screws that were the appropriate length and width for the bracket. This ensures that the bracket is securely attached to the beam and that the rafter is securely attached to the bracket.
Once all of the brackets were attached to the beams, I began installing the rafters. I carefully lifted each rafter into place and secured it to the bracket using screws. I made sure to check that each rafter was level before securing it to the bracket.
In summary, installing the pergola rafters requires attention to detail and a secure connection to the support posts and beams. By using post brackets and screws, I was able to ensure that the rafters were securely attached to the beams, providing added support for the roof.
Finishing Touches and Maintenance
Once you have successfully attached the pergola rafters, it’s time to add some finishing touches to make your pergola look more appealing. You can add some decorative elements such as climbing plants, lights, or curtains to your pergola. These elements will not only enhance the beauty of your pergola but also provide some privacy and shade.
To ensure that your pergola remains sturdy, stable, and durable, it’s essential to use pressure-treated lumber. This type of wood is resistant to rot, insects, and weathering, making it ideal for outdoor use. However, you should still perform regular maintenance to keep your pergola in good condition.
One way to maintain your pergola is by waterproofing it. This process involves sealing the wood with a sealant to prevent water from penetrating the wood. You can use a clear sealant to maintain the natural look of the wood or choose a colored sealant to match your outdoor decor.
Regular maintenance also involves checking for any signs of rot or insect damage. If you notice any signs of rot or insect infestation, you should address the issue immediately to prevent further damage. You can use a wood filler to repair any minor damage or replace the affected parts entirely.
In conclusion, adding some finishing touches and performing regular maintenance will ensure that your pergola remains sturdy, long-lasting, and aesthetically pleasing. By using pressure-treated lumber and waterproofing your pergola, you can prevent rot and insect damage and prolong the life of your pergola.
Enhancing Your Pergola
As a homeowner, you always want to make sure that your outdoor living space is not only functional but also beautiful. A pergola is a great addition to any outdoor space, and with a few enhancements, you can make it even better.
Adding Shade
One of the primary reasons for adding a pergola to your outdoor space is to create a shaded area where you can relax and entertain guests. However, on hot summer days, the sun can still penetrate through the open roof of the pergola. To make your pergola even more comfortable, consider adding a shade cloth or retractable canopy. This will help to keep the shaded area cooler and protect you from harmful UV rays.
Using Decorative Elements
A pergola can also be a beautiful decorative element in your outdoor space. Adding lattice panels or decorative brackets to your pergola can make it stand out and add a touch of elegance to your backyard. You can also add hanging plants or vines to your pergola to create a natural and organic look.
Furnishing Your Pergola
To make your pergola a functional space, consider adding outdoor furniture such as a dining set or lounge chairs. This will allow you to entertain guests or relax in your outdoor space comfortably. You can also add outdoor lighting to your pergola to create a warm and inviting ambiance in the evening.
In conclusion, enhancing your pergola can make it not only a functional space but also a beautiful one. By adding shade, decorative elements, and furniture, you can transform your pergola into an outdoor oasis where you can relax and entertain guests.
Safety Considerations
When it comes to attaching pergola rafters, there are some key safety considerations to keep in mind. As a DIY enthusiast, it is important to understand that pergola construction involves working at heights and with heavy materials. Therefore, it is crucial to take the necessary safety precautions to avoid accidents and injuries.
First and foremost, I recommend seeking professional help if you are not confident in your ability to safely construct a pergola. A professional architect or construction worker can help ensure that your pergola is structurally sound and up to code. They can also provide guidance on the best materials and techniques to use for your specific project.
If you do decide to tackle the project on your own, be sure to wear appropriate safety gear, such as gloves, goggles, and a hard hat. Additionally, make sure to use sturdy ladders or scaffolding to reach high areas, and never stand on the top rung of a ladder.
When attaching the rafters, it is important to use the proper tools and techniques to ensure that they are securely fastened. Be sure to use high-quality screws or bolts, and avoid using nails, which can loosen over time. It is also important to make sure that the rafters are evenly spaced and properly aligned with the support beams.
Finally, be sure to check the weather forecast before beginning your project. High winds or rain can make working at heights even more dangerous, so it is best to wait for calm, dry weather before starting your construction.
By following these safety considerations, you can ensure that your pergola construction project is a success and that you and your loved ones remain safe throughout the process.
Choosing Between DIY and Professional Installation
When it comes to attaching pergola rafters, you have two options: DIY or professional installation. Both options have their pros and cons, and the choice ultimately depends on your skills, budget, and preferences.
DIY Pergola Installation
If you are handy and have experience with woodworking, you may be able to install your pergola yourself. DIY pergola kits are available online and in home improvement stores, and they come with pre-cut and pre-drilled pieces that you can assemble with basic tools.
DIY pergola installation can be a cost-effective option, as you can save money on labor costs. It can also be a rewarding experience, as you get to build and customize your pergola according to your tastes and needs.
However, DIY installation requires time, patience, and attention to detail. You need to follow the instructions carefully, measure and cut the pieces accurately, and ensure that the structure is level and secure. If you make a mistake, you may have to redo the work or compromise the safety and stability of the pergola.
Professional Pergola Installation
If you prefer to leave the installation to the experts, you can hire a professional contractor to install your pergola for you. Professional installation ensures that the pergola is built to code and meets the safety and quality standards of the industry.
Professional installation can also save you time and hassle, as the contractor can handle the permits, materials, and labor for you. You can also benefit from the contractor’s expertise and advice, as they can help you choose the right design, materials, and features for your pergola.
However, professional installation can be more expensive than DIY, as you have to pay for the contractor’s fees, materials, and markup. You also have to coordinate with the contractor’s schedule and availability, which may not always align with your own.
In summary, choosing between DIY and professional installation depends on your skills, budget, and preferences. If you are confident in your woodworking abilities and want to save money, DIY pergola installation may be the way to go. If you want a hassle-free and high-quality installation, professional installation may be worth the investment.
Frequently Asked Questions
https://www.youtube.com/watch?v=UiYsRnC6hkk&embed=true
What is the recommended spacing for pergola rafters?
The recommended spacing for pergola rafters varies depending on the size of your pergola and your personal preferences. A frequently used spacing falls within the range of approximately 16 to 24 inches. However, it is important to note that the spacing should be determined based on the size of your pergola and the weight it will support.
What size should pergola rafters be?
The size of your pergola rafters depends on the size of your pergola and the weight it will support. In general, a 2×8 or 2×10 board is recommended for most residential pergolas. However, if you are building a larger pergola or plan to hang heavy items from the rafters, you may want to consider using larger boards.
How do you attach pergola rafter tails?
Pergola rafter tails can be attached using a variety of methods, including decorative brackets, corbels, or simply cutting the tails to the desired length and securing them to the beam with screws. It is important to ensure that the rafter tails are properly supported and secured to prevent them from sagging or falling off over time.
What is the best way to attach pergola rafters to beams?
The best way to attach pergola rafters to beams is by using rafter ties or joist hangers. These metal brackets are specifically designed to provide a strong, secure connection between the rafter and the beam. It is important to use the appropriate size and type of bracket for your specific pergola design.
Do I need joist hangers for my pergola?
While joist hangers are not always necessary for a pergola, they can provide additional support and stability to the structure. If you plan to hang heavy items from your pergola or live in an area with high winds or heavy snow loads, it may be a good idea to use joist hangers for added strength.
How do I secure a pergola to my roof?
Securing a pergola to a roof requires careful planning and proper installation techniques. It is important to consult with a professional contractor or engineer to ensure that the attachment method is safe and secure. Some common methods for attaching a pergola to a roof include using brackets, anchors, or bolts.

Hi, I’m Sal Muller of Tooltrip.com. My DIY experience led me to understand essential power tools for home projects. Tooltrip.com guides enthusiasts and professionals in choosing right tools for any job. I provide concise top tool reviews for easier, efficient DIY.
