As a homeowner, you may find yourself in need of a deck renovation or addition to your outdoor living space. One of the most important aspects of a deck is the stairs, and when you’re dealing with a 90-degree corner, you’ll need to know how to properly construct a corner stair stringer. A stair stringer is the structural support that holds the treads and risers in place, and constructing one around a corner requires a bit of extra planning and precision.
Understanding Stair Stringers
Before jumping into the construction process, it’s important to understand the basics of stair stringers. These supports are typically made from 2x12s and run the entire length of the stairs. They are cut to size and attached to the deck using metal brackets. When constructing a corner stair stringer, you’ll need to take into account the angle of the corner and the length of each section of the stairs.
Key Takeaways
- Constructing a corner stair stringer requires extra planning and precision.
- Stair stringers are the structural supports that hold the treads and risers in place.
- When constructing a corner stair stringer, it’s important to take into account the angle of the corner and the length of each section of the stairs.
Understanding Stair Stringers
https://www.youtube.com/watch?v=JS1W3Ns2Zgw&embed=true
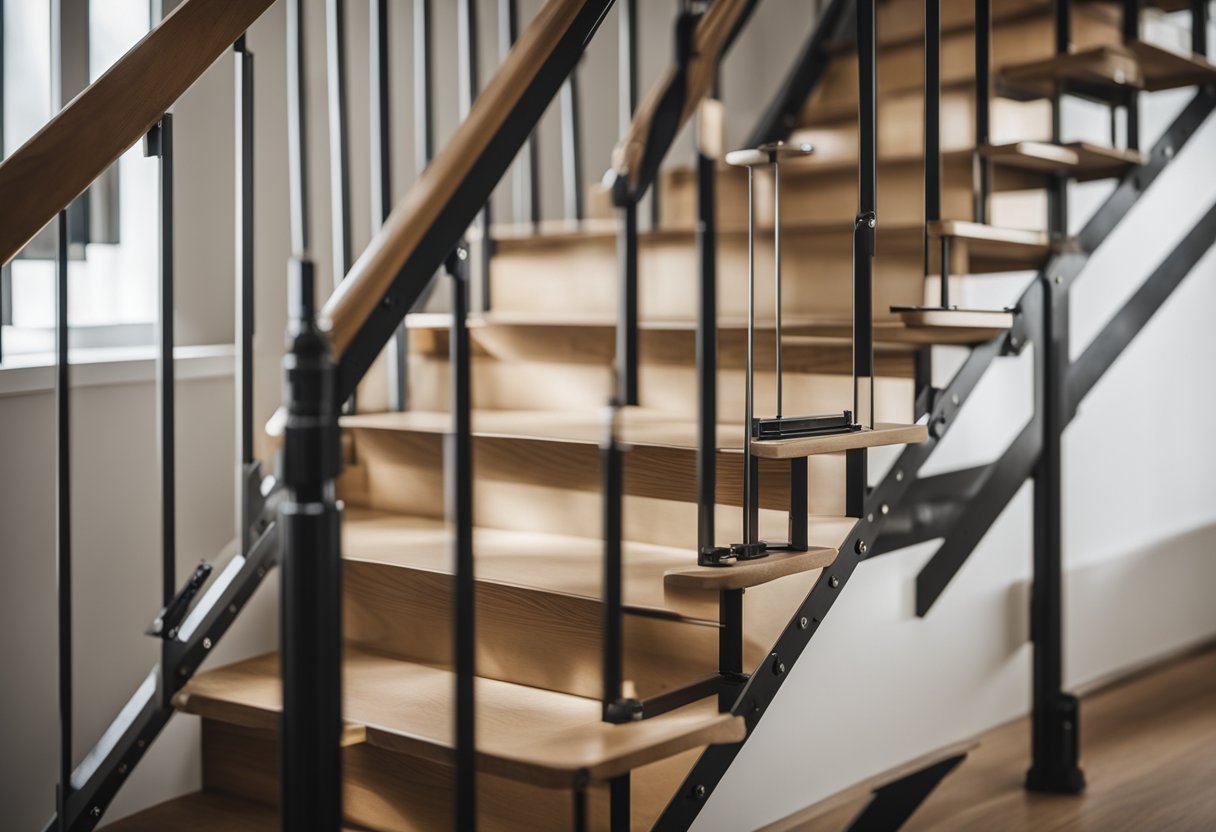
Stair stringers are the backbone of any staircase. They are the diagonal support boards that are notched out to support the treads and risers of the stairs. The stringers are responsible for transferring the weight of the stairs to the support structure below.
When designing and building stairs, it is important to understand the basic principles of stair stringers. There are several factors to consider when calculating the size and spacing of the stringers. These include the width of the stairs, the length of the stairs, and the spacing between the stringers.
The width of the stairs will determine the number of stringers required. The International Residential Code (IRC) requires a minimum of three stringers for stairs that are 36 inches wide or less. For stairs that are wider than 36 inches, additional stringers may be required.
The length of the stairs will determine the length of the stringers. The stringers must be long enough to support the treads and risers of the stairs. The IRC requires that the stringers be long enough to extend past the top and bottom treads by at least 1 inch.
The spacing between the stringers will depend on the size and spacing of the treads and risers. The IRC requires that the maximum spacing between stringers be 24 inches on center. However, it is recommended to space the stringers closer together for added support and stability.
In addition to these basic principles, there are other factors to consider when designing and building stair stringers. These include the type of wood used, the thickness of the wood, and the angle of the stairs. It is important to consult with a professional or reference reliable sources to ensure that the stair stringers are designed and built correctly.
Overall, understanding the basic principles of stair stringers is essential for designing and building safe and sturdy stairs.
Materials and Tools Required
To build a 90-degree corner stair stringer, you will need a few essential materials and tools. Here is a list of the items you will need:
Materials
- Pressure-treated lumber for the stringers and treads
- 4×4 posts for support
- Concrete or gravel for the footings
- Brackets for extra support
- Deck screws
Tools
- Circular saw or miter saw
- Jigsaw
- Framing square
- Measuring tape
- Pencil
- Ear protection
- Gloves
- Paint (optional)
When selecting your materials, make sure that they are of high quality and suitable for outdoor use. Pressure-treated lumber is a popular choice for building decks and stairs because it is durable and resistant to rot and decay.
You will also need a variety of tools to complete the job. A circular saw or miter saw will be necessary for cutting the lumber to size, while a jigsaw can be used to make more intricate cuts. A framing square and measuring tape will help you ensure that your cuts are accurate, while a pencil will allow you to mark your measurements.
It is important to wear ear protection and gloves when using power tools to protect your hearing and hands. Finally, you may want to paint your stair stringers to match the color of your deck or to add a decorative touch.
Calculating and Measuring Stair Dimensions
https://www.youtube.com/watch?v=mB8bnF5SjJs&embed=true
When building a 90 degree corner stair stringer, it is important to accurately calculate and measure the dimensions of the stairs. The following steps will help you determine the necessary measurements:
-
Determine the total rise of the stairs by measuring the vertical height from the finished floor to the finished floor level at the top of the stairs. This measurement will be used to calculate the number of risers needed.
-
Calculate the number of risers needed by dividing the total rise by the desired riser height. The International Residential Code (IRC) requires a maximum riser height of 7 3/4 inches and a minimum tread depth of 10 inches.
-
Determine the total run of the stairs by measuring the horizontal distance from the face of the first riser to the face of the last riser. This measurement will be used to calculate the number of treads needed.
-
Calculate the number of treads needed by dividing the total run by the desired tread depth. The IRC requires a minimum tread depth of 10 inches.
-
Determine the thickness of the treads by measuring the horizontal distance from the face of the first riser to the face of the second riser. This measurement will be used to calculate the thickness of the treads.
-
Calculate the thickness of the treads by dividing the horizontal distance between the risers by the number of treads.
-
Measure the width of the staircase to ensure that it meets building codes. The IRC requires a minimum width of 36 inches.
-
Calculate the number of posts needed by dividing the total run by the maximum allowable distance between posts. The IRC requires a maximum distance of 6 feet between posts.
-
Use a stair calculator, such as the one found at myCarpentry, to double-check your measurements and ensure that your stair stringers are plumb.
By following these steps and using a stair calculator, you can ensure that your 90 degree corner stair stringer is built to code and is safe for use.
Constructing the Corner Stair Stringer
https://www.youtube.com/watch?v=QPvNPIh7Sgo&embed=true
When it comes to constructing a 90-degree corner stair stringer, there are a few things to keep in mind. The first step is to measure the stairway and determine the size of the stringer you will need. You will need to measure the height of the staircase, the length of each step, and the width of the stair treads 1.
Once you have the measurements, you can begin to lay out the stringer. The layout will depend on the corner angle of the staircase. For outside corners, you will need to notch the stringer to fit around the corner. This can be done using a saw and chisel 2.
When notching the stringer, it is important to make sure that the notches are deep enough to fit snugly around the corner. The notches should also be cut at a 90-degree angle to ensure a tight fit. Once the notches are cut, you can attach the stringer to the framing using screws or nails 3.
Overall, constructing a 90-degree corner stair stringer requires precision and careful planning to ensure safety and stability. By taking the time to measure and lay out the stringer correctly, you can ensure that your staircase will be both functional and aesthetically pleasing.
Installation Process
https://www.youtube.com/watch?v=n7Ukro7PWNQ&embed=true
When it comes to installing 90-degree corner stair stringers, precision and careful planning are essential to ensure safety and stability. As an experienced builder, I follow a step-by-step process to ensure that the installation is done correctly.
First, I measure the exact height of the deck from the top of the decking to where the stairs will rest on the ground. This measurement helps me determine the best stair stringer plan for the steps. I also take into account the thickness of the decking and the riser thickness to ensure that the stairs will be the right height.
Next, I cut the stringers to the correct length and angle. I use a saw to make the cuts, and I make sure that they are precise to ensure that the stairs are level and safe.
Once the stringers are cut, I install them using fasteners and blocks. I space the stringers every 16 inches on center and mount them using drop blocks to ensure that they are secure. I also make sure that the top of the stringers is securely connected to the deck to prevent any wobbling or shifting.
After the stringers are installed, I add the stair treads, handrails, and brackets. I make sure that the treads are level and secure, and I use appropriate fasteners to attach the handrails and brackets. I also add trim to give the stairs a finished look.
Overall, the installation process for 90-degree corner stair stringers requires attention to detail and careful planning. By following these steps, I can ensure that the stairs are safe, stable, and aesthetically pleasing.
Safety Measures
https://www.youtube.com/watch?v=Cb77_Z8YUWg&embed=true
As a professional carpenter, I always prioritize safety when installing 90 degree corner stair stringers. Here are some safety measures that I take to ensure a safe and secure installation process.
Wear Protective Gear
Before starting any carpentry work, I always make sure to wear the appropriate protective gear. This includes gloves and ear protection. Gloves help protect my hands from sharp tools and potential splinters, while ear protection helps prevent hearing damage from loud power tools.
Plan Ahead
Proper planning is essential when installing 90 degree corner stair stringers. I always make sure to take accurate measurements and double-check my calculations before cutting any materials. This helps prevent errors and ensures that the stairs are safe and stable.
Follow Building Codes
It’s important to follow building codes and regulations when installing stairs. This includes requirements for tread depth, riser height, and handrail placement. By following these codes, I can ensure that the stairs are up to safety standards and reduce the risk of accidents.
Secure the Stringers
To ensure that the stairs are stable, I always make sure to securely fasten the stringers to the structure. This can be done using bolts or screws, depending on the specific project requirements. By using the appropriate hardware and ensuring a secure attachment, I can reduce the risk of the stairs collapsing or becoming unstable.
By following these safety measures, I can ensure that the installation process of 90 degree corner stair stringers is safe and secure.
Finishing Touches
Now that the 90 degree corner stair stringers are installed, it’s time to add the finishing touches to complete the project. The final steps of the project are just as important as the initial steps, as they can make the difference between a professional-looking staircase and a DIY project gone wrong.
One of the first things to consider is paint. Painting the stairs can add a polished and professional look to the project. Before painting, sand the stairs to ensure a smooth surface. Apply a coat of primer, then paint with a high-quality paint. Consider using a contrasting color for the stringers to make them stand out.
Trim is another important aspect of finishing the stairs. Installing trim around the stairs can give them a polished look. Consider using a decorative trim to add a touch of elegance to the staircase. Trim can also be used to hide any gaps between the stairs and the wall.
If you’re not confident in your carpentry skills, it may be best to hire a professional carpenter to complete the project. A professional will have the experience and tools necessary to ensure the staircase is safe and meets building codes.
In conclusion, finishing the 90 degree corner stair stringers is an important part of the project. Consider painting the stairs, adding trim, and hiring a professional if necessary to ensure a polished and professional look.
Maintenance and Care
As with any component of a building, 90 degree corner stair stringers require proper maintenance and care to ensure their longevity and safety. Here are some tips on how to maintain and care for your stair stringers:
Use Pressure-Treated Lumber
Pressure-treated lumber is a popular choice for building stair stringers because it is resistant to rot and decay. This type of lumber is treated with chemicals that protect it from moisture and insects. When choosing pressure-treated lumber, make sure it is rated for ground contact to ensure maximum durability.
Ensure Stability
Stability is key when it comes to stair stringers. To ensure stability, make sure the stringers are properly anchored to the framing of the building. Use metal brackets or other hardware to secure the stringers in place. Additionally, make sure the stringers are level and plumb to prevent any wobbling or shifting.
Tread Overlap
The tread overlap is the portion of the stair tread that overlaps with the riser. It is important to ensure that the tread overlap is sufficient to provide a safe and secure walking surface. The tread overlap should be at least 1 inch, but no more than 1.5 inches. This will prevent tripping hazards and ensure a stable walking surface.
By following these tips, you can ensure that your 90 degree corner stair stringers remain safe and durable for years to come.
Frequently Asked Questions
How can I build corner steps for my deck?
To build corner steps for your deck, you will need to cut stair stringers at a 90-degree angle. This can be a bit tricky, but there are several resources available online that can guide you through the process. You will also need to measure the height of your deck and the distance from the deck to the ground to determine the length of the stringers. Once you have cut your stringers, you can install them and add the treads and risers.
How do I build inside corner stairs for my deck?
To build inside corner stairs for your deck, you will need to cut two sets of stair stringers at a 45-degree angle. You will then need to install the stringers and add the treads and risers. There are several resources available online that can guide you through the process.
What are some ideas for corner deck stairs?
There are many different design ideas for corner deck stairs. Some popular options include using contrasting colors for the treads and risers, adding lighting to the stairs for safety and ambiance, and incorporating decorative elements such as railings or planters. You can also choose from a variety of materials, including wood, composite, and metal.
What angle should I cut my stair stringers for a 90 degree corner?
To cut stair stringers for a 90-degree corner, you will need to make a triangular-shaped notch in the stringer. The angle of the cut will depend on the height of your deck and the distance from the deck to the ground. There are several online resources available that can guide you through the process of determining the correct angle for your stringers.
What is the maximum angle allowed for a staircase?
The maximum angle allowed for a staircase varies depending on local building codes and regulations. In general, the maximum angle for residential staircases is 37 degrees. However, it is important to check with your local building department to ensure that your staircase meets all applicable codes and regulations.
How wide can stairs be without a center stringer?
The width of stairs that can be built without a center stringer varies depending on the type of material used for the treads and risers. In general, stairs made from wood can be up to 36 inches wide without a center stringer, while stairs made from other materials such as metal or composite may require a center stringer for added support. It is important to check with your local building department to ensure that your stairs meet all applicable codes and regulations.
Footnotes

Hi, I’m Sal Muller of Tooltrip.com. My DIY experience led me to understand essential power tools for home projects. Tooltrip.com guides enthusiasts and professionals in choosing right tools for any job. I provide concise top tool reviews for easier, efficient DIY.


