
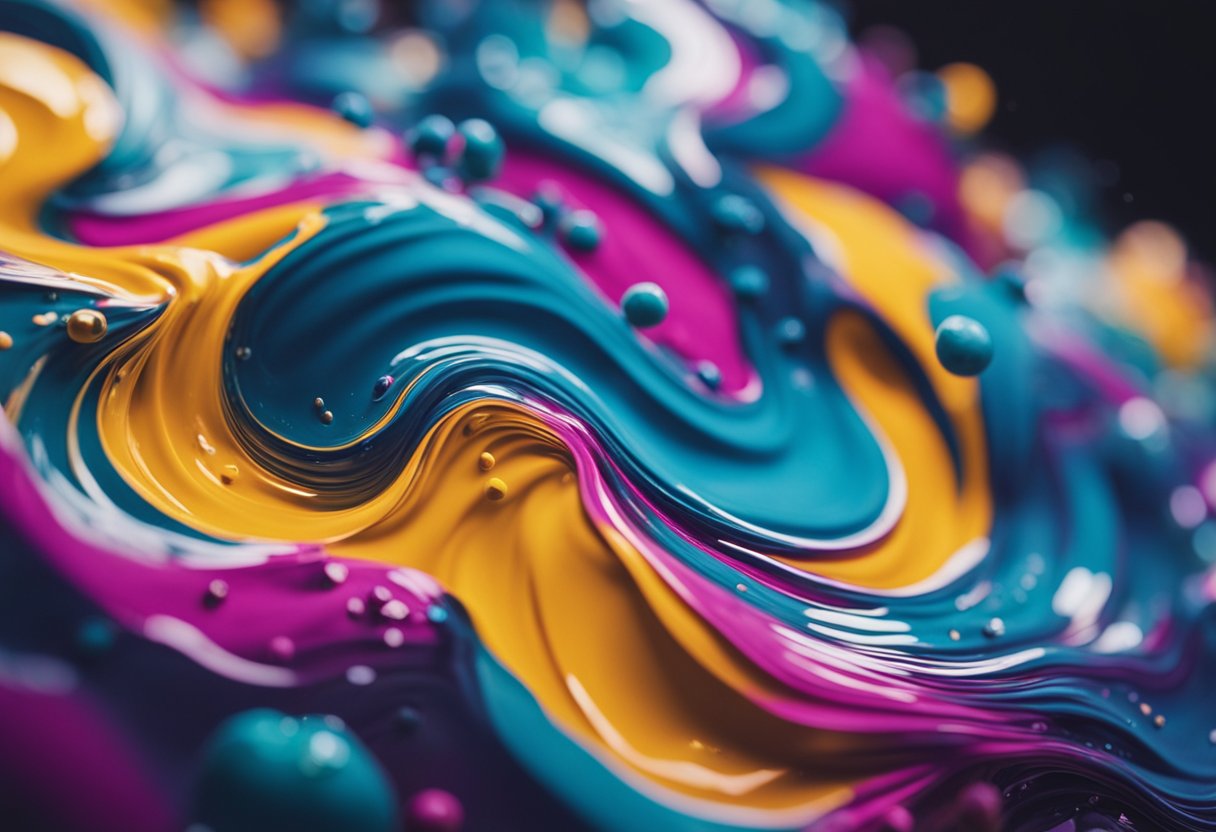
Hydro dipping is a popular technique that allows you to create unique and colorful designs on a variety of surfaces. It involves dipping an object into a water-based solution that has been sprayed with acrylic paint. The paint adheres to the surface of the object, creating a marbled or swirled effect that is both eye-catching and visually appealing.
To hydro dip with acrylic paint, you will need to gather a few materials and tools, including a container for the water-based solution, acrylic paint, and a handle to hold the object you want to dip. You will also need to prepare the surface of the object by cleaning and drying it thoroughly, as well as protecting any areas you don’t want to be painted.
Once you have everything you need, you can begin the process of hydro dipping. There are various techniques you can use to create different effects, such as swirling the paint with a toothpick or comb, or using stencils to create specific shapes or patterns. With a little practice and experimentation, you can create stunning and unique designs that are sure to impress.
Key Takeaways
- Hydro dipping is a popular technique that allows you to create unique and colorful designs on a variety of surfaces.
- To hydro dip with acrylic paint, you will need to gather a few materials and tools and prepare the surface of the object.
- There are various techniques you can use to create different effects, such as swirling the paint or using stencils to create specific shapes or patterns.
Understanding Hydro Dipping
Hydro dipping is a popular technique that allows you to apply intricate designs to a variety of surfaces, including metal, plastic, and even wood. It is also known as water transfer printing or immersion printing. In hydro dipping, a hydrographic film is used to transfer a pattern or design onto an object’s surface. The film is placed onto the water’s surface, and the object is dipped into the water, allowing the film to wrap around the object’s surface.
One of the most popular methods of hydro dipping is the hydrographic film method. This method involves using a hydrographic film that is printed with the desired pattern or design. The film is placed onto the water’s surface, and a special activator is sprayed onto the film, causing it to dissolve and activate the ink. The object is then dipped into the water, allowing the ink to transfer onto the object’s surface.
Hydro dipping is a versatile technique that can be used to create a wide range of designs, from simple patterns to complex graphics. It is also an affordable way to customize objects, making it a popular choice for hobbyists and professionals alike.
Overall, hydro dip painting is a fun and creative way to add a unique touch to your belongings. With the right materials and techniques, you can create stunning designs that are sure to impress.
Materials and Tools Required
Hydro dipping with acrylic paint requires a few materials and tools to get started. Here are the essential items you will need:
- Acrylic paint: You will need acrylic paint in your desired colors for the hydro dipping process. You can also use enamel paint or spray paints, but acrylic paint is the most commonly used.
- Water: Water is the main component in the hydro dipping process. You will need a container that is large enough to dip the object you want to paint.
- Container: Use a container that is large enough to dip the object you want to paint. A storage bin or bucket works well.
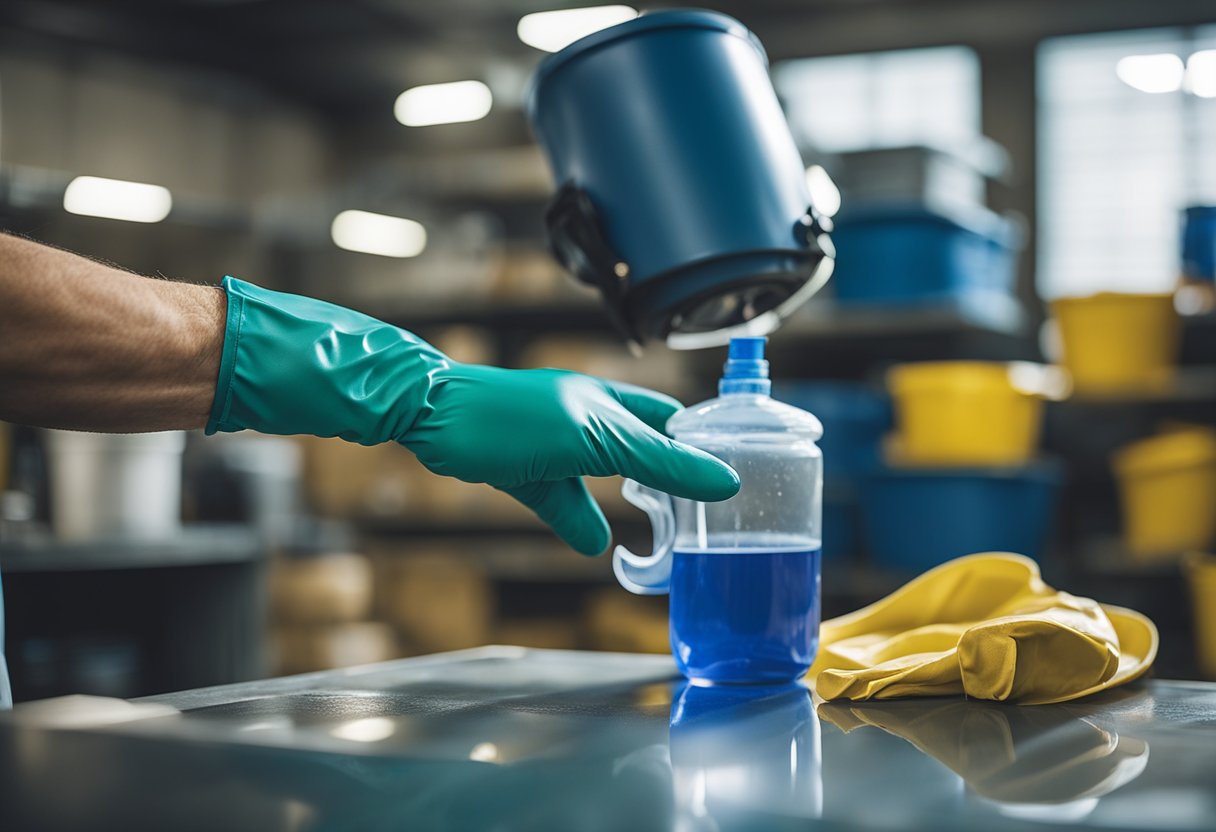
- Gloves: Protective gloves are essential to protect your hands from the paint and chemicals.
- Hydrographic film: Hydrographic film is used to transfer the design onto the object. You can find a variety of patterns and designs online.
- Tray: A tray is necessary to hold the film in place while you dip the object.
- Tape: Masking tape is used to secure the film in place on the tray.
- Cornstarch: Cornstarch is used to thicken the water to help the paint adhere to the object.
- Borax: Borax is used to make the paint float on the water. You can also use borax to create a borax method to help the paint adhere to the object.
- Toothpick or paintbrush: A toothpick or paintbrush is used to manipulate the paint on the water.
- Pipettes: Pipettes are used to drop the paint onto the water surface.
- Silicone oil: Silicone oil is used to create a marbled effect on the object.
- Acrylic medium: Acrylic medium is used to thin down the acrylic paint.
- Liquid detergent: Liquid detergent is used to clean the object before painting.
- Respirator mask: A respirator mask is necessary to protect your lungs from the fumes.
- Goggles: Goggles are necessary to protect your eyes from the paint and chemicals.
- Drying rack: A drying rack is necessary to let the object dry after painting.
Make sure you have all the materials and tools ready before you start the hydro dipping process. It’s important to follow the instructions carefully and take the necessary safety precautions to avoid any accidents.
Preparation Process
https://www.youtube.com/watch?v=wAJfJAV4tnY&embed=true
Before starting the hydro dipping process with acrylic paint, I make sure to prepare all the necessary materials and follow a few steps to ensure the best results. Here are the steps I follow:
Step 1: Choose the Object to Dip
First, I choose the object I want to paint. Hydro dipping works well on a variety of surfaces, including metal, fabric, leather, and even phone cases. It’s important to make sure the object is clean and free of any dirt or debris before starting the process.
Step 2: Prepare the Surface
Next, I prepare the surface of the object to ensure good paint adhesion. This involves cleaning the object with a degreaser and sanding it lightly to create a surface that is not too dense. If the object has a primer or base coat, I make sure it is dry and sanded before proceeding.
Step 3: Mix the Acrylic Paint
To create the hydro dip pattern, I mix the acrylic spray paint with a binding agent. The binding agent helps the paint adhere to the object and creates a non-toxic, protective coating. I use a 1:1 ratio of paint and binding agent, but the exact ratio may vary depending on the brand of paint used.
Step 4: Prepare the Water
I fill a container with water and add the acrylic paint mixture to the surface of the water. I use a toothpick or brush to create a pattern on the surface of the water.
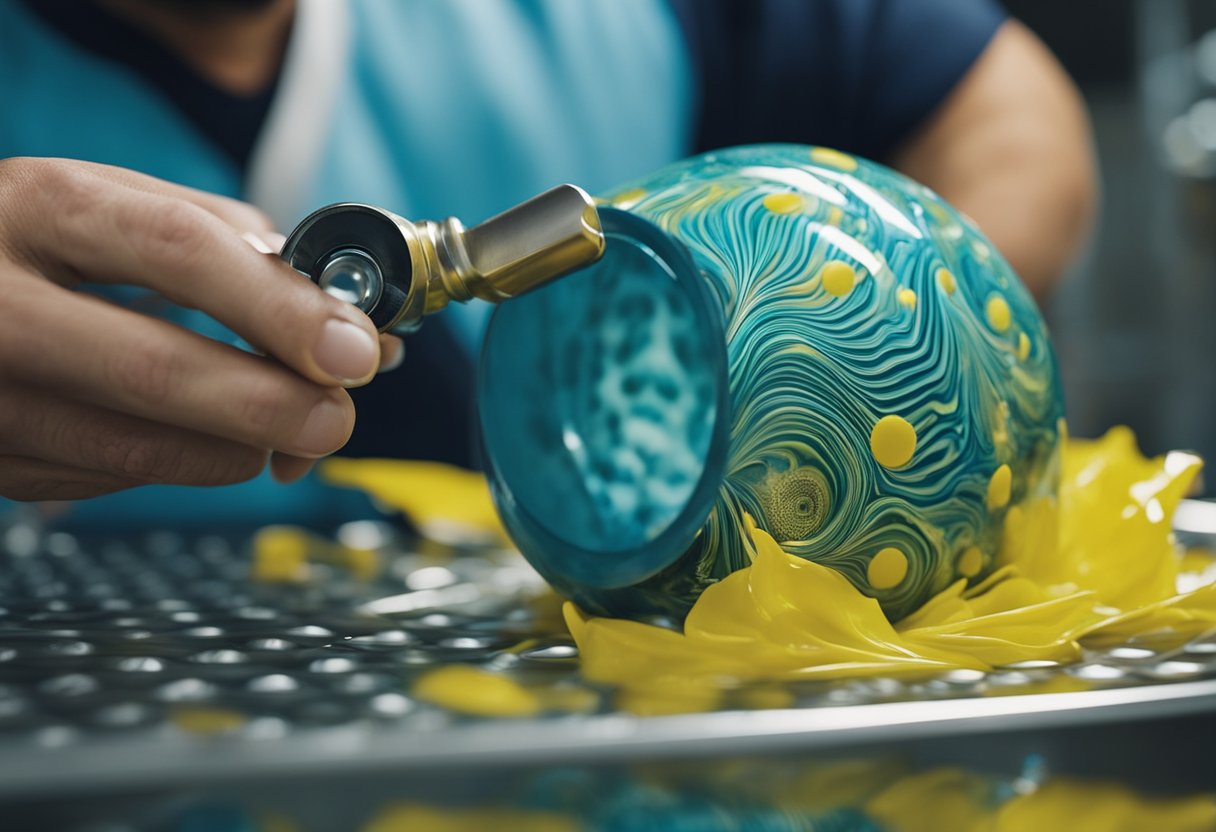
Step 5: Dip the Object
I use a handle to hold the object and slowly dip it into the container of water, making sure to submerge it completely. I then slowly pull the object out of the water, being careful not to touch the painted surface.
Step 6: Dry and Protect the Object
Once the object is removed from the water, I let it dry completely on a drop cloth or canva. I then apply a protective coating to the surface of the object to ensure the paint does not chip or fade over time.
Overall, the preparation process for hydro dipping with acrylic paint is simple and straightforward. By following these steps, I can create unique and colorful patterns on a variety of surfaces.
Hydro Dipping Techniques
https://www.youtube.com/watch?v=HI0fBirRJPU&embed=true
Hydro dipping is a fun and creative way to add color and pattern to various objects. There are several techniques you can use to achieve different effects, from simple swirls to intricate patterns.
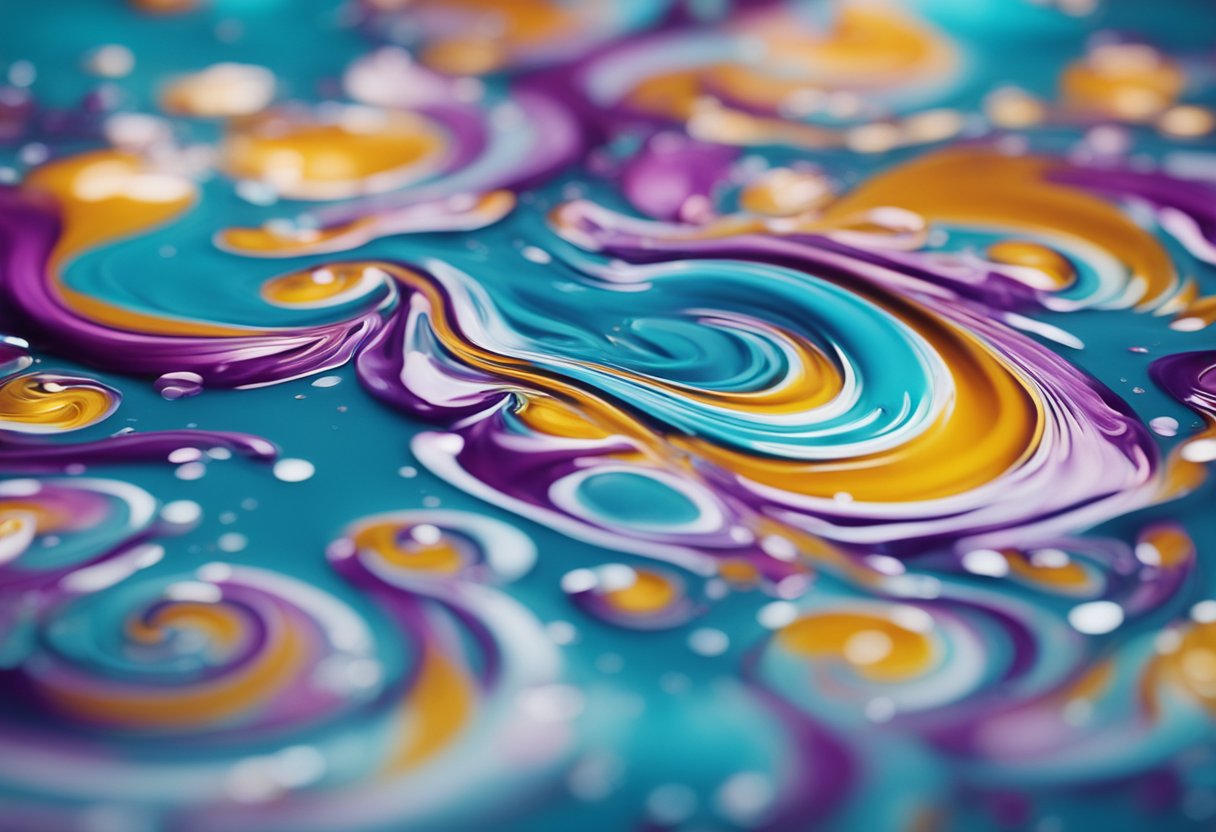
One of the most popular techniques is marbling. To marble with acrylic paint, you will need to mix the paint with water and a pouring medium to thin it out. Then, you can drip the paint onto the surface of the water in a tub and use a stick to swirl the colors together. Once you have a pattern you like, you can dip your object into the water and let it float on top of the paint. The excess paint can be removed with a brush or by blowing on the surface of the water.
Another technique is using a hydro dipping film. This is a purpose-made film that has a pattern printed on it. You can place the film on top of the water in a tub and spray an aerosol activator on it to dissolve the film and activate the floating ability of the paint. Then, you can dip your object into the water and let it float on top of the paint. Once you remove the object, you can rinse off the excess film and apply a clear coat for a glossy finish.
For beginners, it is best to start with simple patterns and colors. Once you become more comfortable with the process, you can try more complex patterns and experiment with different types of hydro dipping paints. Some people even use nail polish or ink to achieve unique effects.
Overall, hydro dipping with acrylic paint is a fun and easy way to add color and personality to your items. With a little practice and experimentation, you can create beautiful and unique designs on shoes, 3D objects, paper, and more.
Finishing and Curing
Once you have completed the hydro dipping process with acrylic paint, the next step is finishing and curing. This step is crucial as it enhances the durability and longevity of your work.
Clear Coat
Applying a clear coat is an essential step in finishing your hydro dipped object. Clear coat protects your object from scratches, fading, and UV damage. It also gives a glossy finish to your object, making it look more attractive. You can choose between a matte or glossy finish clear coat depending on your preference.
Drying Time
After applying the clear coat, it is essential to let the object dry thoroughly. The drying time depends on the type of clear coat used, the humidity, and temperature. In general, it takes around 24 hours for the clear coat to dry completely. It is crucial to avoid touching or handling the object during the drying time to prevent smudging or damaging the finish.
Glossy Finish
If you want a glossy finish on your hydro dipped object, you can use a gloss enhancer. A gloss enhancer is a clear coat that enhances the glossiness of the object. It is applied after the clear coat has dried, and it gives a wet and shiny look to the object. However, it is essential to follow the instructions on the gloss enhancer carefully to avoid over-application, which can lead to a sticky and uneven finish.
In conclusion, finishing and curing are essential steps in the hydro dipping process with acrylic paint. Applying a clear coat, letting the object dry thoroughly, and using a gloss enhancer, if desired, will enhance the durability and look of your work.
Safety Measures and Tips
As with any art project, safety should be a top priority when hydro dipping with acrylic paint. Here are some safety measures and tips to keep in mind:
Protective Gear
It is essential to wear protective gear such as gloves, goggles, and a respirator mask when hydro dipping with acrylic paint. Gloves will protect your hands from the chemicals in the paint, while goggles will protect your eyes from splashes and drips. A respirator mask will prevent you from inhaling any fumes or particles that may be harmful to your lungs.
Ventilation
Hydro dipping with acrylic paint can produce fumes that are hazardous to your health. Therefore, it is crucial to work in a well-ventilated area or wear a respirator mask to avoid inhaling any harmful fumes.
Masking Tape
Masking tape is an essential tool when hydro dipping with acrylic paint. It helps to protect areas that you do not want to be painted. Cover any parts of the object that you want to remain unpainted with masking tape before dipping.
Protective Gloves
Protective gloves are necessary when working with chemicals, including acrylic paint. They will protect your hands from any harmful chemicals that may be present in the paint.
In conclusion, safety should always be a top priority when hydro dipping with acrylic paint. Always wear protective gear, work in a well-ventilated area, and use masking tape to protect areas that you don’t want to paint. By following these safety measures and tips, you can enjoy the art of hydro dipping with peace of mind.
Hydro Dipping on Different Surfaces
https://www.youtube.com/watch?v=qx1PwLxkC68&embed=true
Hydro dipping is a versatile process that can be used on a variety of surfaces. Acrylic paint is an excellent medium for hydro dipping, and it can be used on a wide range of surfaces, from wood and fabric to metal and glass.
One of the most popular surfaces for hydro dipping is shoes. You can use acrylic paint to create unique and colorful designs on sneakers, boots, and other types of footwear. You can also use hydro dipping to customize phone cases, adding a personal touch to your device.
Hydro dipping is also a great way to decorate 3D objects. You can use it to add color and texture to 3D printed objects, giving them a unique and eye-catching look. Additionally, you can use hydro dipping to decorate furniture, such as chairs and tables, as well as home decor items like vases and picture frames.
When it comes to fabrics, hydro dipping can be used on a variety of materials, including cotton, polyester, and silk. You can create vibrant designs on t-shirts, hats, and other clothing items. Hydro dipping is also an excellent way to add color and texture to leather, making it a popular choice for customizing shoes and jackets.
While hydro dipping is versatile, it is important to note that not all surfaces are suitable for this process. For example, ceramics and glass may not be the best choice for hydro dipping, as they require a special type of paint that can withstand high temperatures. Additionally, some metals may not be compatible with acrylic paint, so it is important to choose the right type of paint for the surface you are working with.
Overall, hydro dipping with acrylic paint is a fun and creative way to add color and texture to a wide range of surfaces. With its versatility and ease of use, it is a popular choice for DIY enthusiasts and artists alike.
Troubleshooting Common Issues
https://www.youtube.com/watch?v=9ZzO2OKAyEg&embed=true
As with any painting technique, hydro dipping with acrylic paint can have its fair share of issues. Here are some common problems that beginners might encounter and some possible solutions:
1. Excess Paint
One of the most common issues with hydro dipping is excess paint. This can happen when you dip the object too slowly or when you use too much paint. Excess paint can cause the pattern to blur or smudge and can ruin the overall effect.
To avoid this, make sure to dip the object quickly and smoothly and use the right amount of paint. You can also use a brush or a pipette to remove any excess paint on the surface of the water before dipping.
2. Imperfect Patterns
Creating intricate patterns with hydro dipping can be challenging, especially for beginners. Common issues include uneven patterns, smudging, and bleeding.
To create more intricate patterns, try using a hydrographic film or a marbling technique. You can also experiment with different paint colors and brush strokes to create unique effects.
3. Paint Adhesion
Another common issue with hydro dipping is paint adhesion. This can happen when the object is not properly prepared or when the paint is not compatible with the object’s surface.
To improve paint adhesion, make sure to clean and sand the object’s surface before dipping. You can also use a primer or an enamel paint as a binding agent. Additionally, make sure to use purpose-made hydro dipping paints that are designed for the specific surface you are working with.
4. Safety Gear
Hydro dipping with acrylic paint can be messy and potentially hazardous. It is important to wear protective gear such as gloves, goggles, and a respirator mask to avoid inhaling toxic fumes or getting paint on your skin.
To further minimize the risk of accidents, use a drop cloth to protect your work area and a drying rack to prevent the object from touching other surfaces while drying.
Overall, hydro dipping with acrylic paint is a versatile and fun painting technique that can produce stunning results. With the right tools and techniques, you can create intricate patterns and unique designs on a variety of surfaces, from fabrics to metals to glass.
Frequently Asked Questions
https://www.youtube.com/watch?v=zeYTV86GDXs&embed=true
How can I create a marble effect with acrylic paint using hydro dipping?
To create a marble effect with acrylic paint using hydro dipping, you need to float different colors of paint on top of each other. Once you have the desired amount of paint on the surface, you can swirl the colors using a toothpick, skewer, or other similar tool. Then, dip your object into the water at a 45-degree angle and let it sit for a few seconds before removing it. The swirling effect will transfer onto your object, creating a beautiful marble effect.
What is the recommended type of paint for hydro dipping?
Acrylic paint is the most common type of paint used for hydro dipping. It is water-soluble, which makes it easy to work with, and it adheres well to most surfaces. You can use either liquid or spray paint depending on your preference. However, it is important to note that not all acrylic paints are suitable for hydro dipping, so be sure to check the label before purchasing.
How do I thin acrylic paint for hydro dipping?
To thin acrylic paint for hydro dipping, you can use water or a paint thinner. The amount of water or paint thinner you need to add depends on the thickness of the paint and the desired consistency. It is important to add the water or paint thinner slowly and mix thoroughly until you achieve the desired consistency. However, it is recommended to use a paint thinner sparingly as it can affect the adhesion of the paint to the object.
Can I use alcohol ink for hydro dipping?
Yes, you can use alcohol ink for hydro dipping. Alcohol ink is a highly pigmented ink that is designed to be used on non-porous surfaces. It is a popular choice for hydro dipping because it creates vibrant and unique designs. However, it is important to note that alcohol ink can be expensive and may not adhere well to some surfaces.
What liquid should I use for hydro dipping?
Water is the most commonly used liquid for hydro dipping. It is important to use room temperature water, as cold water can cause the paint to clump and warm water can cause the paint to dry too quickly. You can also add a thickener such as cornstarch or borax to the water to help the paint adhere better to the object.
How can I hydro dip without using spray paint?
You can hydro dip without using spray paint by using liquid acrylic paint. To do this, you need to mix the acrylic paint with water or a paint thinner until it reaches the desired consistency. Then, you can follow the same steps as you would with spray paint. However, it is important to note that liquid acrylic paint can be messier to work with and may require more practice to achieve the desired results.

Hi, I’m Sal Muller of Tooltrip.com. My DIY experience led me to understand essential power tools for home projects. Tooltrip.com guides enthusiasts and professionals in choosing right tools for any job. I provide concise top tool reviews for easier, efficient DIY.
Related posts:
 Paint Over Plasti Dip: A Complete Guide to Removing and Repainting Your Car’s Plasti Dip Coating
Where Can I Get Something Encased in Acrylic: A Guide to Finding the Perfect Acrylic Encapsulation Services
Revive Acrylic Paint: Tips and Tricks for Bringing Your Paint Back to Life
What is Kiss Apple Fresh Acrylic Masking Liquid? A Clear Explanation
Paint Over Plasti Dip: A Complete Guide to Removing and Repainting Your Car’s Plasti Dip Coating
Where Can I Get Something Encased in Acrylic: A Guide to Finding the Perfect Acrylic Encapsulation Services
Revive Acrylic Paint: Tips and Tricks for Bringing Your Paint Back to Life
What is Kiss Apple Fresh Acrylic Masking Liquid? A Clear Explanation